
Chicken Wire for that WOW Mantel Garland
What I learned decorating my mantel for Christmas using a chicken wire base for that WOW factor sculptural garland look!
Chicken wire...on the mantel? What?
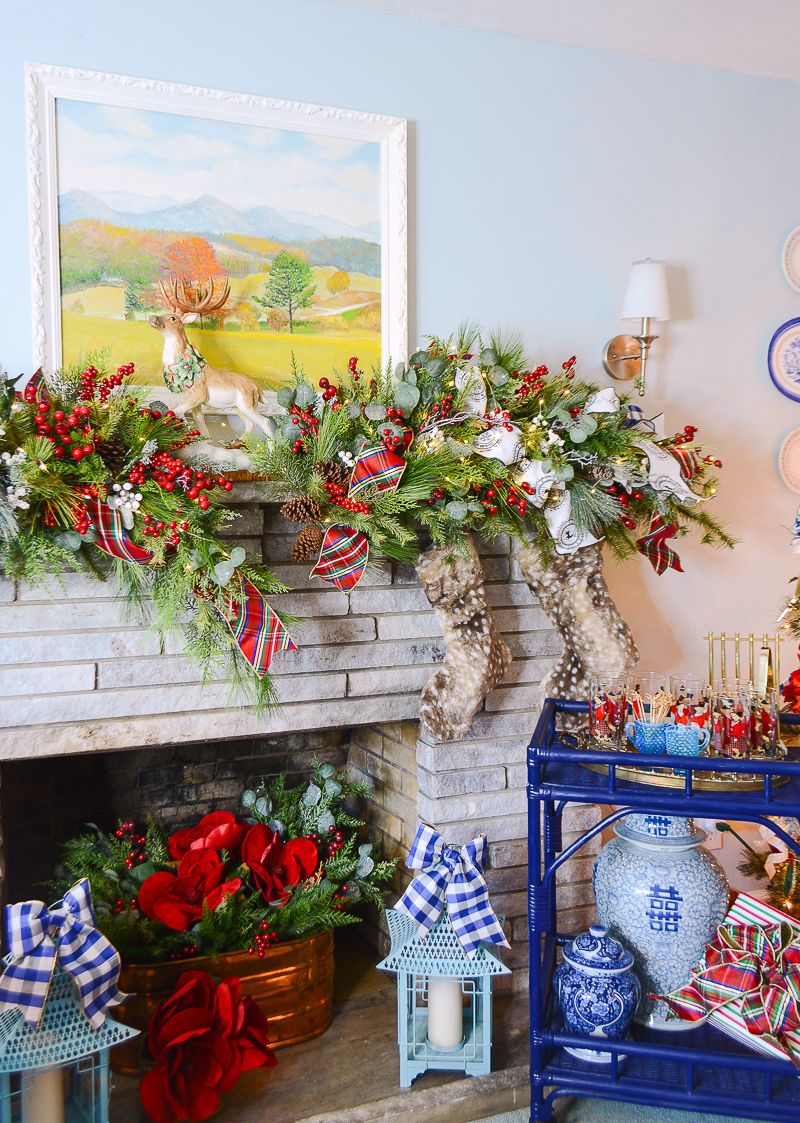
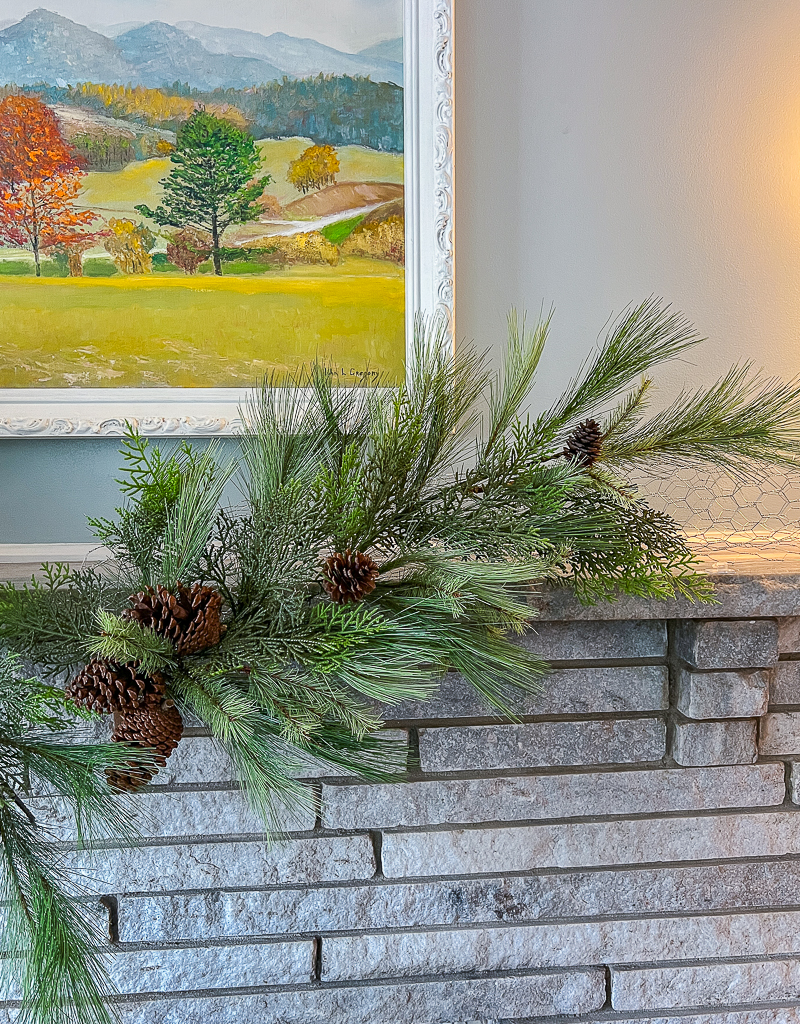
Have you noticed this floral hack making the rounds of IG and Pinterest? Me too! And I decided this was the year to try it on the stone mantel in our family room. I always struggle securing the garland to this fireplace because it is entirely stone and the mantel shelf is very narrow (only 7" deep).
I love the look of a WOW garland that feels sculptural and ultra full, but this fireplace gives me grief every year. Enter the clever solution of chicken wire! My friend Suzanne of @suzannezinggstyle inspired me to try a foundation of chicken wire secured to the mantel with Command hooks to achieve the look I want. Suzanne is a master at beautiful lush mantel garlands, and you must check out her profile.
I'm thrilled with the Christmas garland I was able to create with this floral hack, and while working with the wire to unwrap and secure it was a bit trying, once in place the assembly was so quick and pain free!
Here is a review of what I learned using chicken wire to create a WOW mantel garland and the benefits to this technique...
3 Benefits to a Chicken Wire Base for Garland:
No. 1 Helps Create a Sculptural Garland
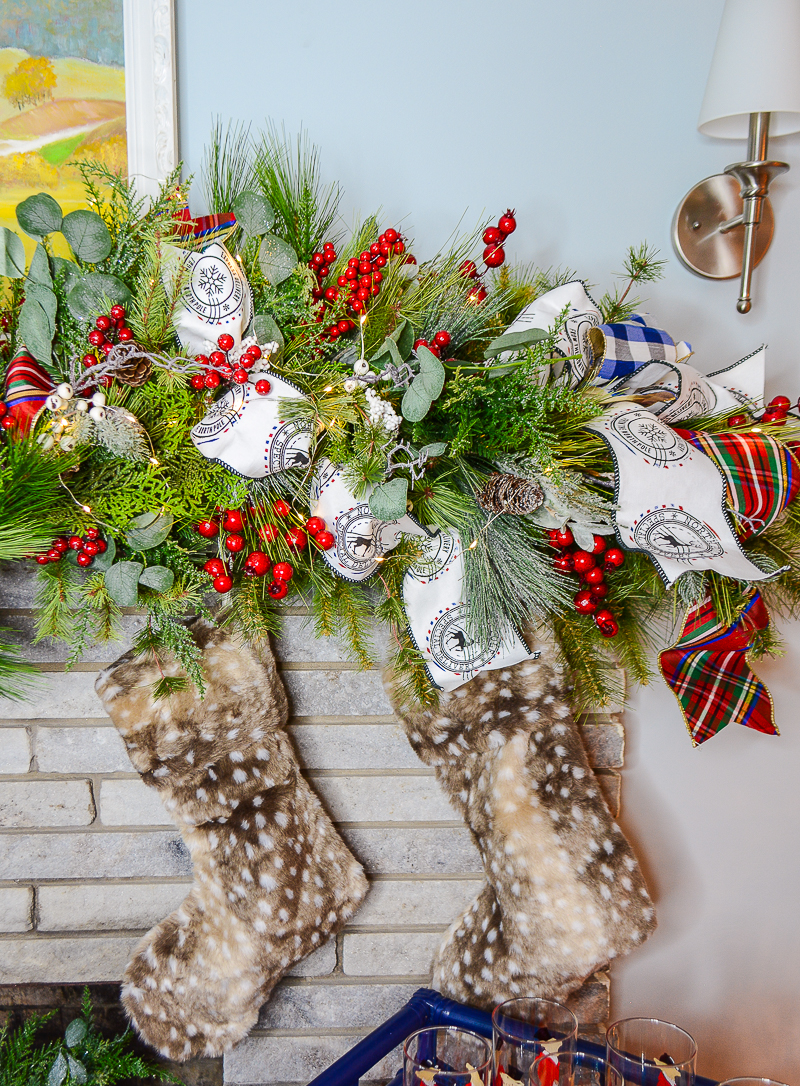
This floral hack works really well to achieve a sculptural garland style that has height and volume! You can create unique and custom forms that fit your mantel and fireplace architecture. For the look here in my family room I used faux pine teardrop swags (like this) in a two part wave form.


No. 2 Ability to Use Mantel Shelf
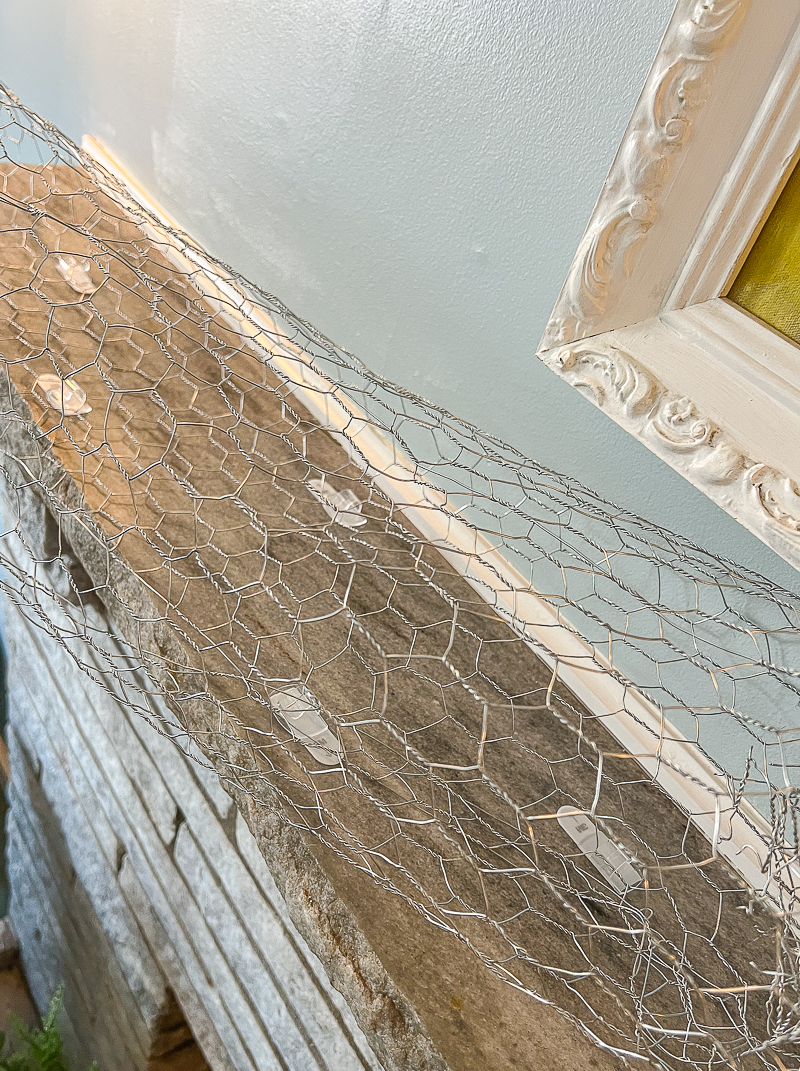
Creating a chicken wire foundation gives you the option to take the garland off the mantel shelf, bringing the greenery to the tip of the board and/or below it. You could also use it to go up the wall behind the mantel board. Then you have the option of putting other decor or lighting on the actual mantel shelf. The tube of wire I created for this foundation wasn't ideal for that, see below on what I would do differently.

No. 3 The Ease and Functionality is Awesome
The grid form of the wire makes adding in different floral picks and decor so easy. You don't really need to worry about using additional wire to secure something, and the stems are easily adjusted or removed to play with different looks and positioning.
The 5 Things I learned Decorating my Mantel with Chicken Wire:
No. 1 Next time I will try the speciality floral grid wire in a smaller size. For this project, I used what I had, which was a regular 24" wide roll of galvanized chicken wire. It was bulky and difficult to unroll and clip down to size, so the next time I do this I'm ordering this green floral wire that is only 4" wide instead.
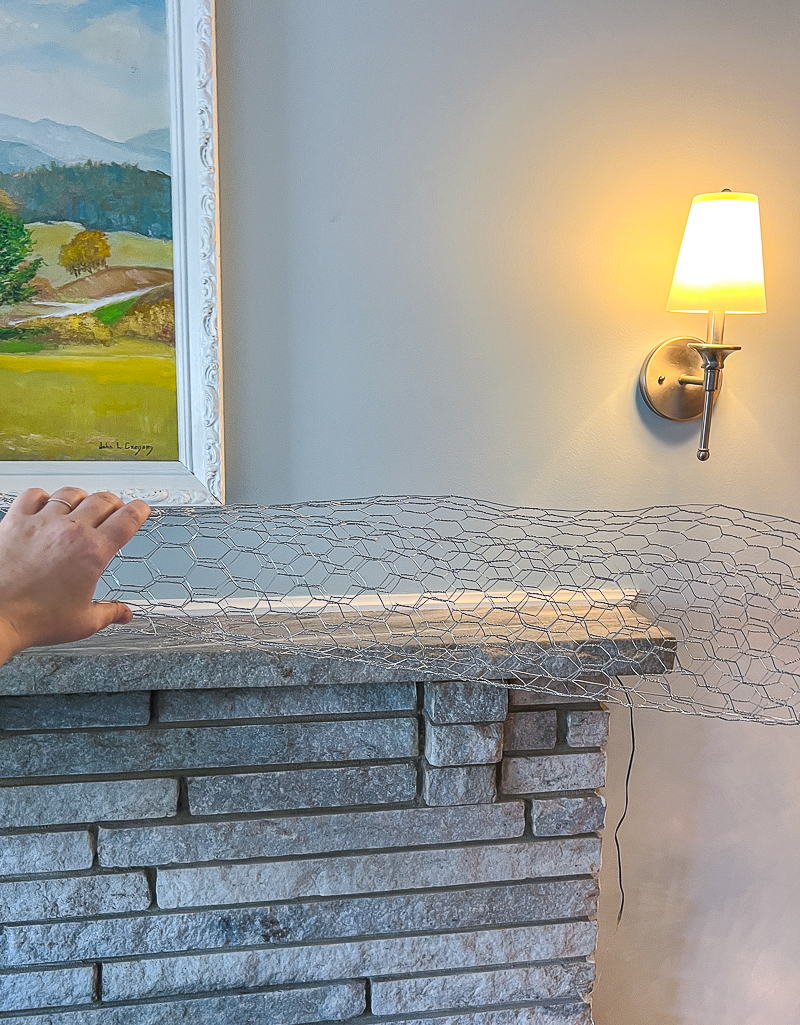
No. 2 Use smaller tubes of wire with only one layer. I rolled my chicken wire lengths into tubes to run across the mantel, but because I got tired of clipping through the grid I rolled too many layers of the wire in on itself. This made it harder to keep attached to the Command hooks and made the garland a bit too bouncy. Lesson - if you use regular chicken wire make your tubes small with only one layer of grid or just cut narrow flat pieces to go across the mantel.
No. 3 Wear gloves! I ended up scratching my hands to bits clipping and working with the wire.
No. 4 The light clip Command hooks worked best on stone with this heavy garland and be sure to turn them all so the clip opening faces the back wall. I tried the toggle hooks too, but they all popped off the stone. As I built the garland and it got heavier the chicken wire pulled free of the hooks I had turned to face the front edge of the mantel, so next time I'll turn them all to face the back.
No. 5 Buy enough floral picks or greenery to hide the ends of the mantel where you can see the chicken wire. I didn't think through the total shape of the garland before hand and what it would be like on the ends of the mantel. Next time I will buy some additional greenery picks to stick at the end to hide the chicken wire. See it peeking out there beside the bow...
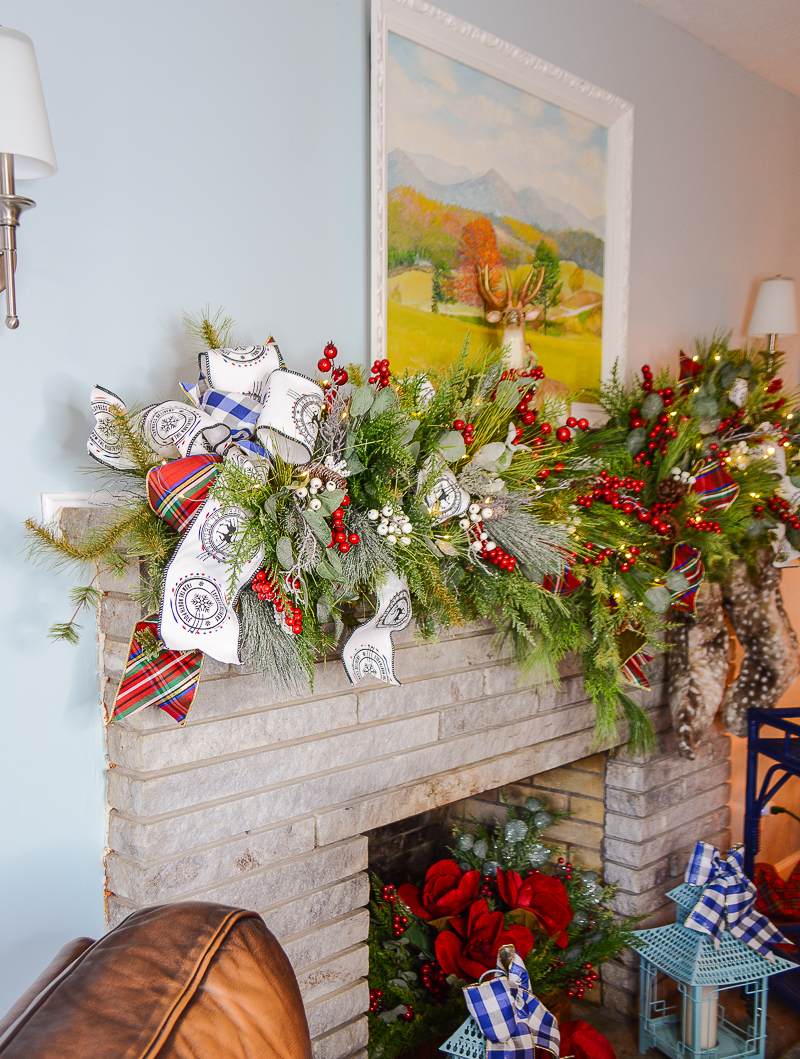
After I attached the four teardrop swags of faux pine, I added in picks of red and white berries that also had eucalyptus, cedar, and lambs ear. Finally, I created these bold multi-ribbon bows to go at each end and then ran streamers of the plaid and postage stamp ribbons throughout the greenery.
Learn how to make these multi-ribbon bows in my Holiday Ribbon Decorating Guide!


I cannot recommend using the chicken wire base technique for decorating your mantel with garland enough! I will definitely be using it again and again. I hope by sharing what I learned you will avoid my mistakes and feel confident trying this floral DIY for yourself!
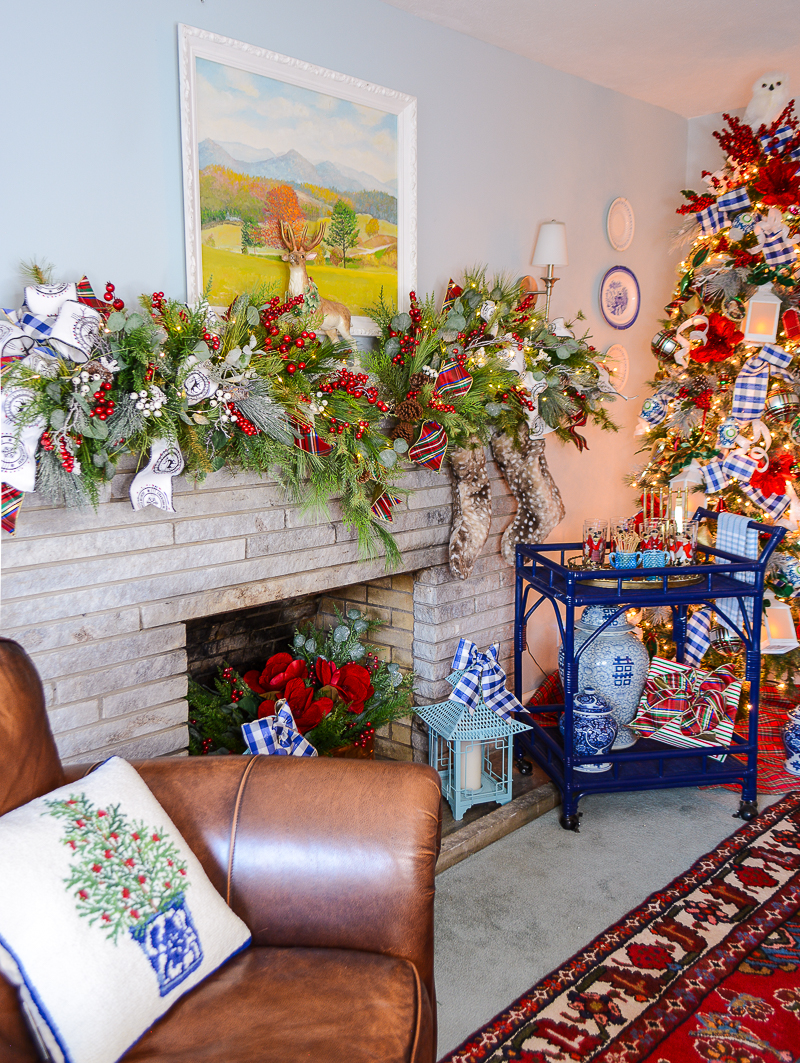
Head to this post to see the rest of my family room decorated in the Preppy Chinoiserie Christmas look!
Hi there! I'm Katherine...

the curator, writer in residence, and decorator behind Pender & Peony.
I’ve decorated my entire 1960s brick colonial with secondhand finds and antiques on a budget without sacrificing style, quality, or comfort.
You CAN have a traditional home with timeless charm on a budget too!
The problem isn't your taste -- it's an industry that glorifies the next big trend and only showcases high end custom design.
That's why I created The Collected Room Method to teach you my approach to the collected interior!