
The Simple Way to Frame a Painting with Offset Clips
5 easy steps to frame a painting on canvas using offset clips and a back-loading frame.

You’ve found the perfect painting for your wall after hunting countless estate sales, thrifts, and galleries. It has eye catching colors and a subject that speaks to you!
The only drawback…it’s un-framed.
Don’t let that hiccup stop you from buying it! Yes, framing can be expensive, but if you are willing to hunt for a frame and twist a screwdriver a couple of times you can frame it yourself for a very reasonable price!
This post will teach you how to frame a painting on canvas with a simple, tried and true method using offset clips and a back-loading frame.
Here is some weird trivia about me:
I’ve probably seen the back of hundreds upon hundreds of paintings. In my past life as an art museum registrar and director at an auction house, it is literally what I use to do day in, day out…examine art works that is. Offset clips are by far the most regular, safe, and simple way to mount a canvas painting in a frame, and it takes no special skill to frame your art this way!
Choosing a Frame
Think of the frame as the transition between your walls and the decor of the space and the art work. You want the frame to complement both, but it is really important that it show off the painting to its best advantage. I prefer when frames and paintings coordinate in terms of style. So if it is a modernist abstract painting then I like a simple frame without ornamentation. If it is a painting based more in realism or a traditional subject matter, I opt for a more decorative frame.
Remember a frame is also about protecting the painting. The frame will safeguard the edges of the canvas and can help prevent warping of the stretchers.
For my grandmillennial style, I tend to lean towards frames in gold or white with rounded edging and indentations. I also love a small stamped pattern or beaded border, and you won’t find me turning down an antique gilt plaster one that’s for sure.
Size Matters
Finding the right size frame is often the trickiest part of souring pre-made or vintage frames for your art work. To ensure your painting will fit within the frame measure the outside edges both length and width of the canvas painting.
On the frame measure the inside opening length and width from the back of the frame. Your canvas painting must fit within that pocket.

Get the Right Hardware
To frame a canvas painting in a back-loading frame you will need offset clips (sometimes called z-clips or offsets), short screws, and D-rings (strap rings).
Offset clips come in a variety of sizes, depending on the depth you need to secure the frame to the canvas stretcher. The stretcher is often wider than the frame depth; thus, the need for the offset. In my experience, a variety pack like this includes most sizes needed for framing, and it comes with short screws. To double check, measure the amount of stretcher projecting past the frame.
D-rings are essential for stringing your picture wire for hanging. Here I am using short D-rings that only require one screw. If you have a large heavy painting and frame, get the version that has a longer strap part with holes for two screws.

How to Frame a Painting with Offset Clips
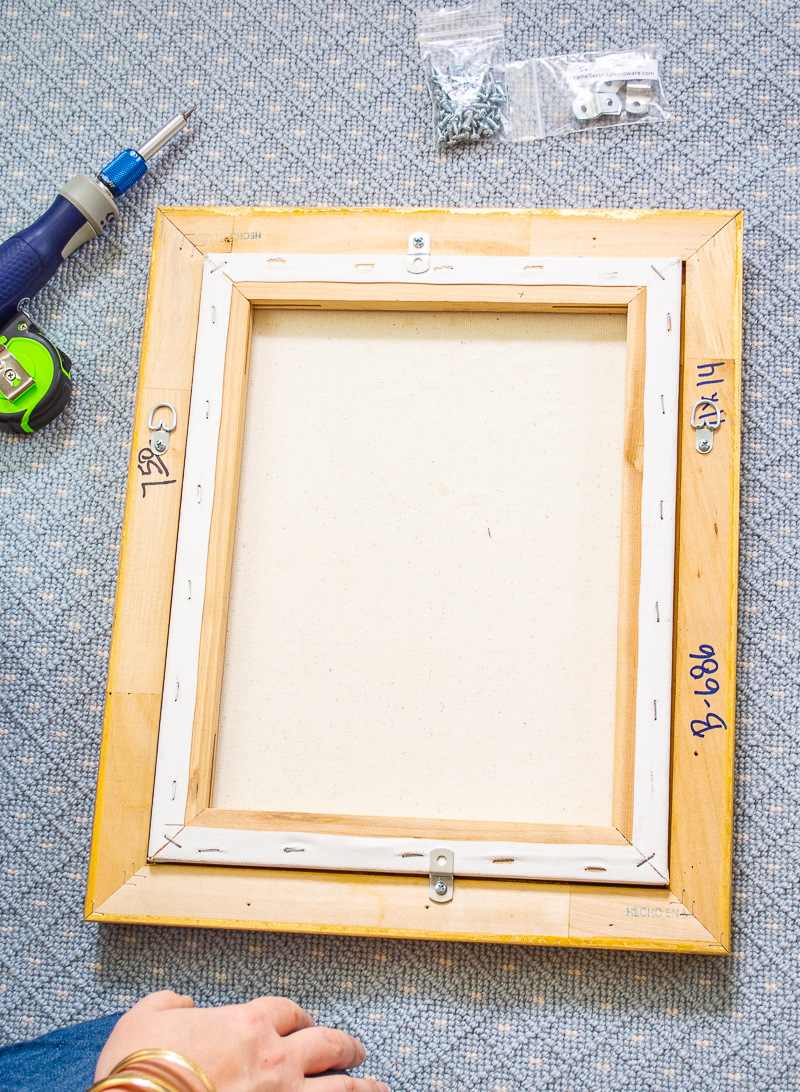
Step No. 1 Situate the painting inside the frame
Step No. 2 Put the offset clips in place
Find the size offset clip that best fits from the frame over the stretcher. Here I used 1/4 inch clips. Because this is a small painting, I am only using clips at the top and bottom and only screwing the clip to the frame.


For larger paintings and frames, I would put a clip on all four sides and screw the clip down to both the frame and stretcher. If it is really large, say over 40 inches, I would use two clips on each side spacing them out towards the corners.

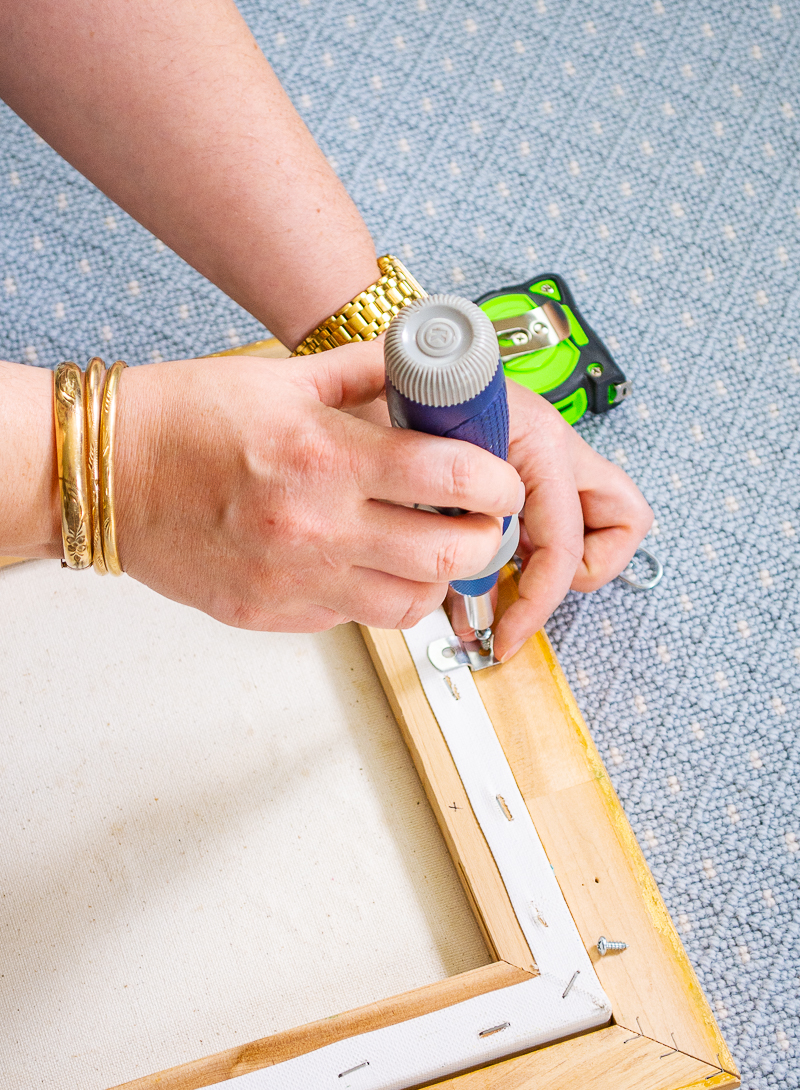
Step No. 3 Screw the clips in place
Most offset clip packs come with short screws. Be sure to use these short screws because you do not want the screw drilling through the front of the frame.
Step No. 4 Add the D-rings on the side of the frame
I like to place D-rings four to six inches from the top of the frame on smaller paintings and six to ten inches on larger frames. This placement is far down enough to hide the wire, but not so far down as to make the top of the frame tilt out from the wall.
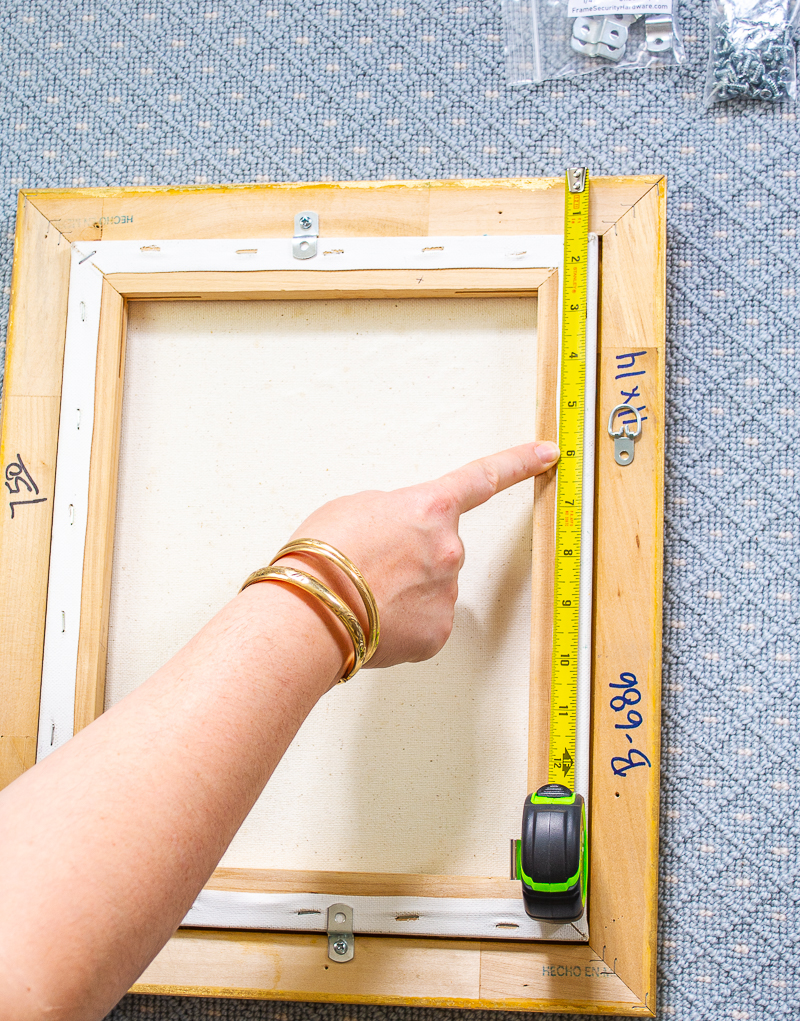
The really important thing when securing your D-rings is to get each side even at the same distance from the top of the frame, so that the art work hangs evenly. Again be sure to use short screws so they do not puncture the front of the frame.
Step No. 5 String your picture wire
I like to use this kind of flexible picture wire. It is easy to twist and kind to the hands. Be sure to buy the right strength based on the weight of the framed painting.
Thread the loose end of the wire through both D-rings. On the D-ring with the end of the wire, pull about four to five inches past the ring, loop it around the ring again then twist it around the wire between the two D-rings, making tight coils.
Pull the other end taut through that D-ring and trim it, leaving about four to five inches. Repeat the loop and twisting.
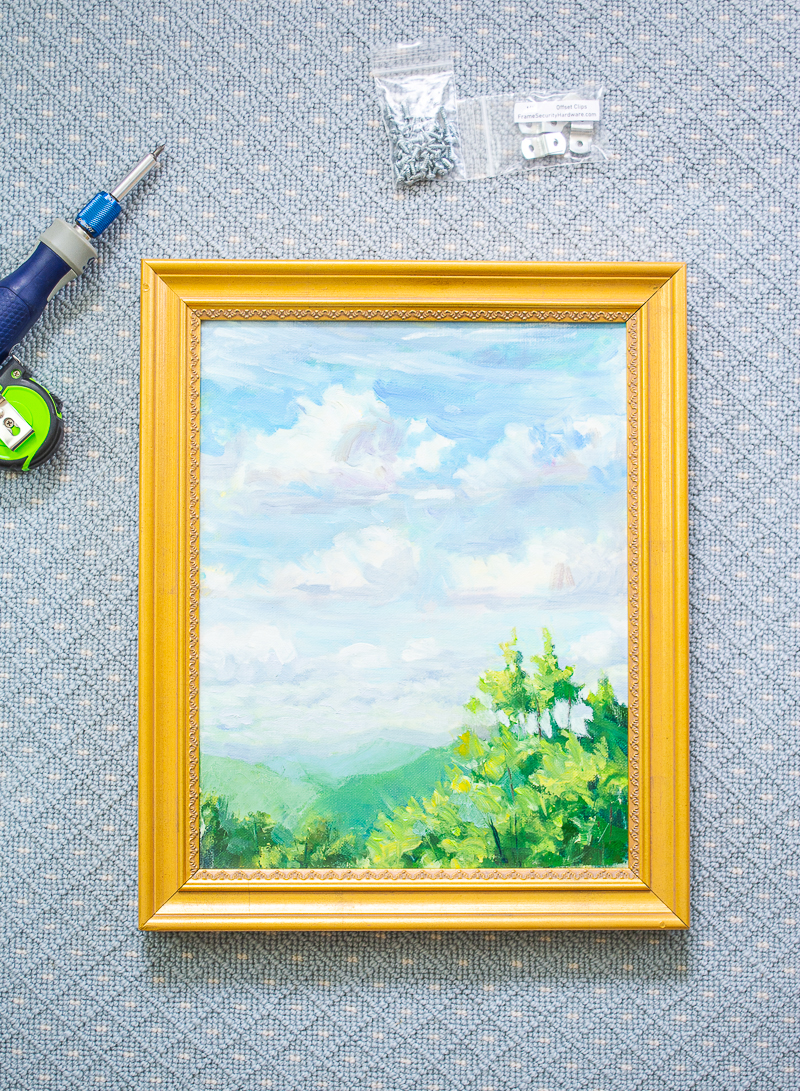
And that’s it! Your lovely painting is ready to be hung on the wall!
Hi there! I'm Katherine...

the curator, writer in residence, and decorator behind Pender & Peony.
I’ve decorated my entire 1960s brick colonial with secondhand finds and antiques on a budget without sacrificing style, quality, or comfort.
You CAN have a traditional home with timeless charm on a budget too!
The problem isn't your taste -- it's an industry that glorifies the next big trend and only showcases high end custom design.
That's why I created The Collected Room Method to teach you my approach to the collected interior!
Thanks so much for this super helpful tutorial! I learned so much and the hotlinks were so handy!
So glad it helped you!
So, my picture has about an inch thick sides and the frames I have found are not that thick. Any tips about what to do about that?
Hi Becky! It doesn’t matter with off-set clips. You just buy one with a longer length to match the depth. Lots of canvases stick out past the frame that’s why the offset clip works to secure.
Where are the best places to buy these frames? I have so many canvases needing framing I am not sure where to get frames other than the standard canvas floater frames.
Hi Katie! The great thing about the off set clips is you can basically make any regular picture frame work with a painting. I like Jerry’s Artarama for plein air frames! But most of my frames I find at thrift shops or estate sales.
How does this work when hanging it on the wall if the canvas protrudes from the back of the frame? I’m currently trying to frame a 3/4″ canvas and my frame is only 5/8″ depth. I have noticed if I use it with offset clips, the frame will appear to be floating on the wall instead of touching the wall, because the canvas will be touching the wall. Can you tell when it’s hanging?
This is how the majority of paintings are framed. Yes, you’re right that the canvas will hit the wall, but no it really doesn’t appear to be floating. How often do you look directly from the side? If it is something that will bother you then you will have to get a frame that matches the depth of your canvas stretcher. They make a flat clip to attach the two if this is the case.
Very helpfull for the canvas
. Thank you. I would like to put a paper backing on the framed canvas to further protect it. Do you have a tutorial on that please or any tips?
Denise, a paper backing is really not necessary, and it could actually do harm if you don’t use acid free paper and a safe glue. No, I do not have a tutorial. I would not recommend this.