
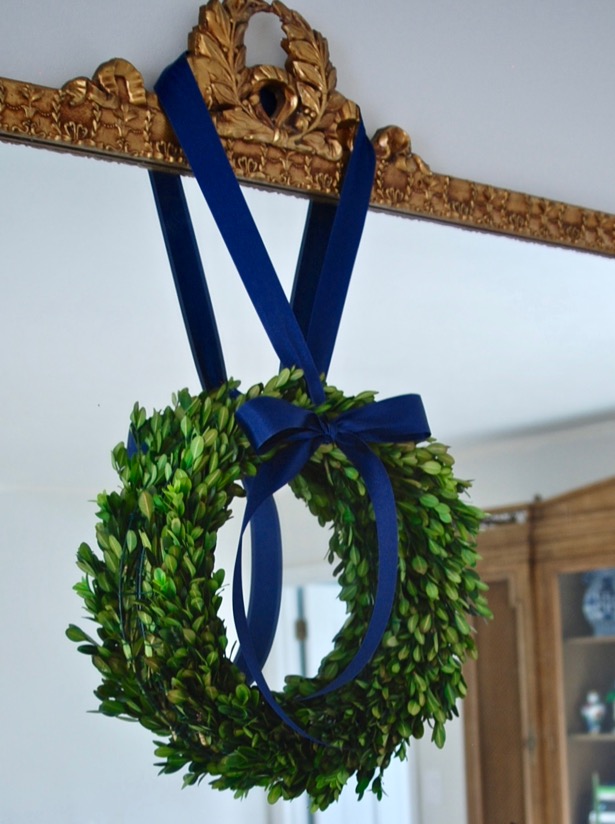
Preserved Boxwood Wreath Tutorial
Is there any greenery more elegant than boxwood? Nope, not in my book, although magnolia comes in pretty close!
I love preserved boxwood decorations whether its wreaths, garland, or topiaries, but I have not been willing to pay the hefty price tag for these items. As I was planning my Christmas decor this year, I decided to use a rich blue and green color scheme, and of course a preserved boxwood wreath was a necessary element in my decor plans. I finally decided the time had come to make my own!
To start I read several tutorials on how to preserve boxwood. I recommend reading this one because it gives you specific measurements for the glycerin dye solution. However, it doesn’t tell you how to make the actual wreath, so I thought I would share the whole DIY with you lovely peonies. I hope you find my preserved boxwood wreath tutorial helpful!
Here is What You’ll Need to Make a Preserved Boxwood Wreath
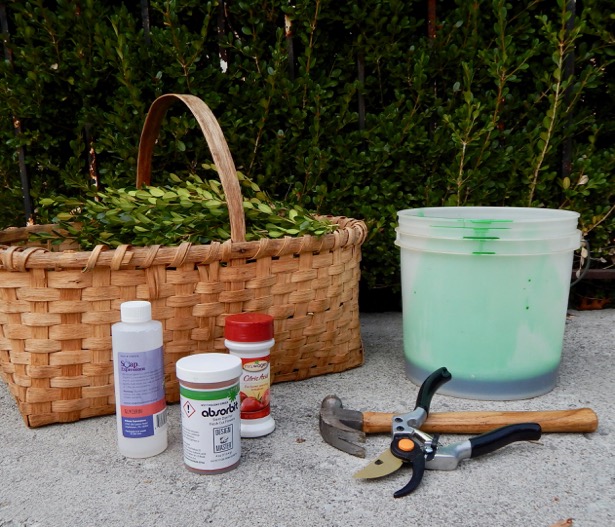
- Boxwood Clippings – 100, 8 to 10 inch sprigs (this made 2, 12 inch wreaths). Make sure leaves are green and unblemished.
- Wire Wreath Ring & Floral Wire
- Clippers & Hammer
- 16 oz. Glycerin
- 2 tsp. Absorbit Stem Dye Holiday Green
- 1 tsp. Citric Acid
- 6 cups Warm Water
- Tall Bucket or Tub
Steps to Make a Preserved Boxwood Wreath
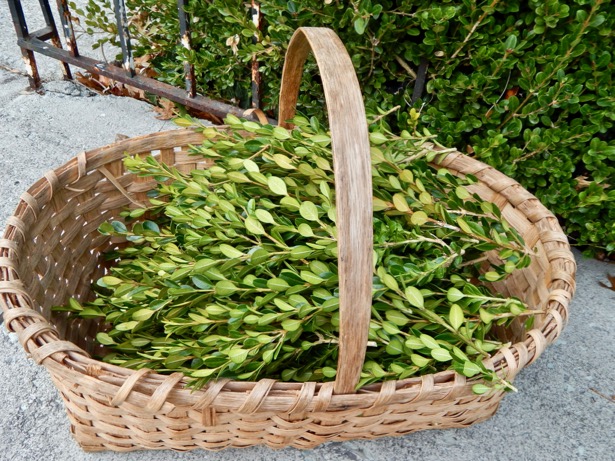
No.1 Cut your boxwood sprigs about 8 to 10 inches long. Be sure to gather your boxwood after a good rain. Look for straight sprigs with unblemished leaves.
No. 2 Start the preservation process immediately after cutting boxwood. Smash ends of sprigs with hammer to help them soak up the glycerin dye solution.
No. 3 Mix the glycerin dye solution. First make your dye concentrate by mixing 2 teaspoons of Absorbit stem dye with 1 cup of warm water. Then mix the 16 ounces of glycerin with 5 cups of warm water in the bucket or tub you plan on soaking the boxwood stems in. Be sure to stir vigorously until the glycerin dissolves. Next add the teaspoon of citric acid, and finally mix in the dye concentrate.
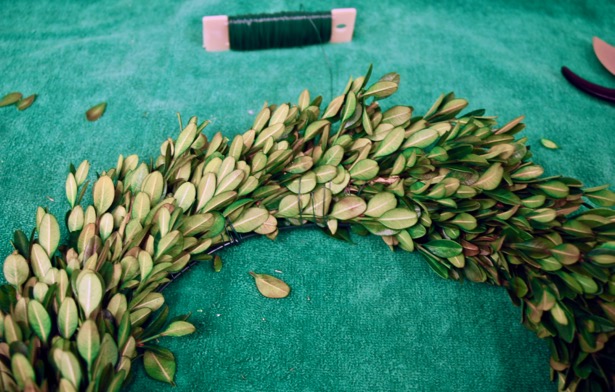
No. 4 Place the boxwood cuttings in the bucket with the smashed ends down in the glycerin dye solution. Cuttings should be loosely packed, and make sure every end is in the solution. I used 2 buckets with the solution divided between them. Let cuttings dry for 10 to 14 days or until the solution is gone. When the cuttings are done they should be glossy and flexible. You may see some brown in the leaves, depending on the dye absorption.
No. 5 Remove boxwood sprigs from the glycerin dye solution and cut off the ends that were down in the liquid. This removes the stained part and cuts down on the mess from the green dye.
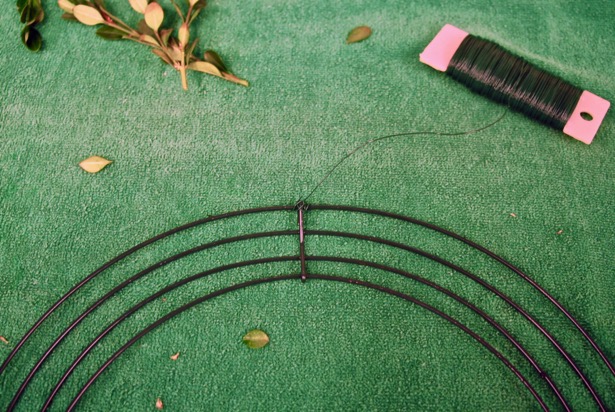
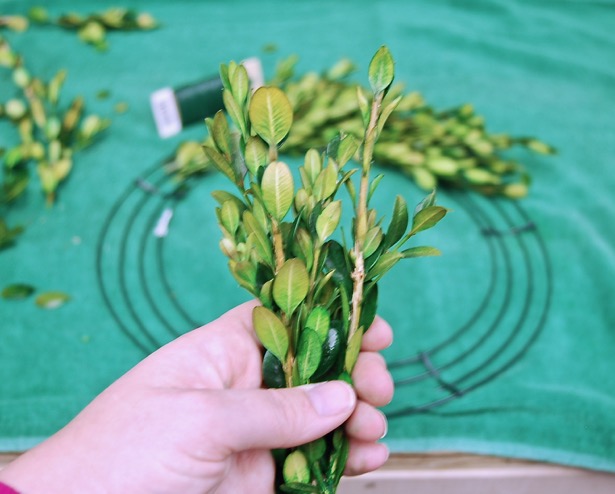
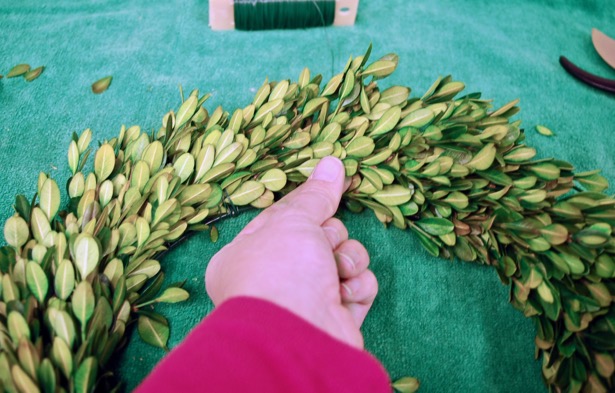
No. 6 To make your wreath, secure one end of the floral wire to the top of the wreath ring. Then prepare your first hand of boxwood, which should be about 4 – 5 inches long and 1 – 2 inches in diameter. You can choose to make a full wreath with the sprigs fanned out or a more slim wreath like mine. To make the fuller wreath you will need to use more sprigs in each hand and create a fan shape with the sprigs. As you create each hand cut the 8-10 inch sprigs in half and use both parts, but layer the top leafy section over the bottom stem part.
No. 7 Lay your first hand of boxwood down on the wreath ring and wrap the floral wire 3 or 4 times around the boxwood stems and ring. Then prepare your next hand of boxwood and lay it down over the stems of the first hand. Wrap the wire 3 or 4 times on this hand and repeat the process working around the ring in one direction continuously overlapping the boxwood until you’ve gone completely around the wreath ring. For a uniform shape, try to make each boxwood hand about the same length and thickness.
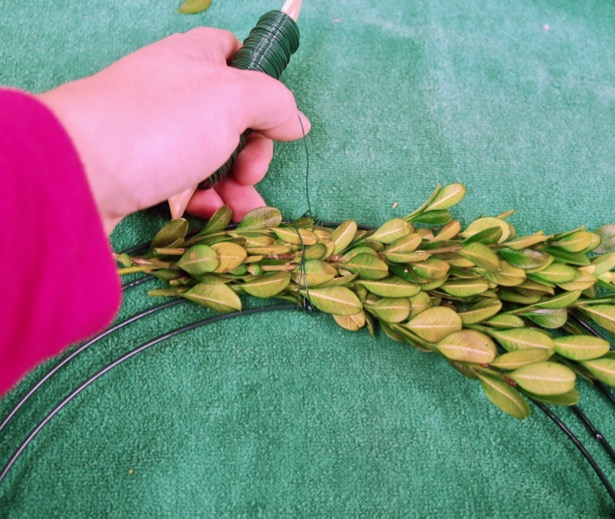
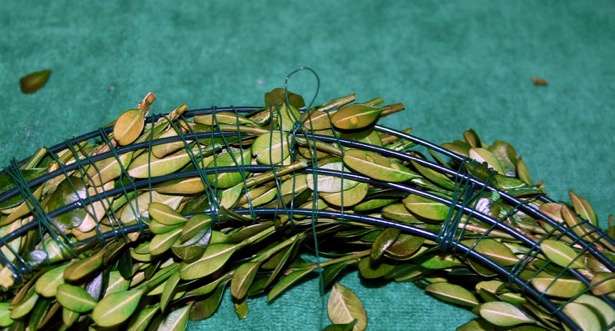
No. 8 When you reach your starting position on the ring be sure to tuck the ends of the boxwood under the top leafy part of your first hand and wrap the wire underneath that first hand as well. If you can see the wire on your last hand, take one or two sprigs of boxwood and tuck into the wire to strategically hide it.
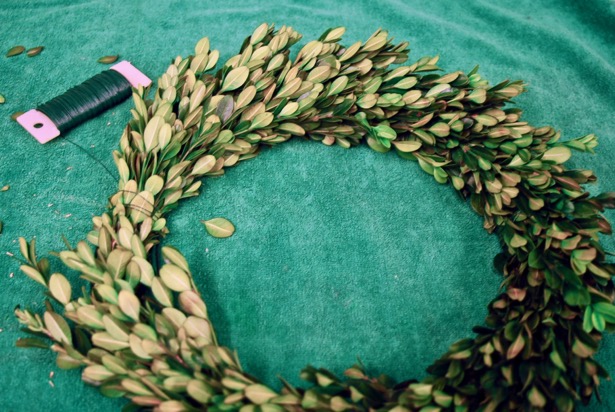
No. 9 Tie off the floral wire on the back side of the ring making a loop for hanging.
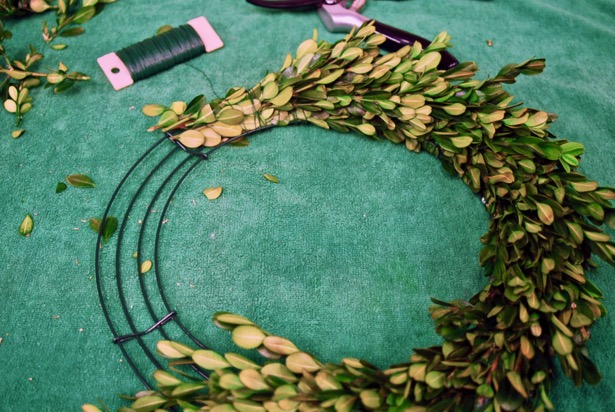
No. 10 Examine your wreath for any variations in shape. You may need to go back and cut errant boxwood sprigs that stick out too far from the overall shape.
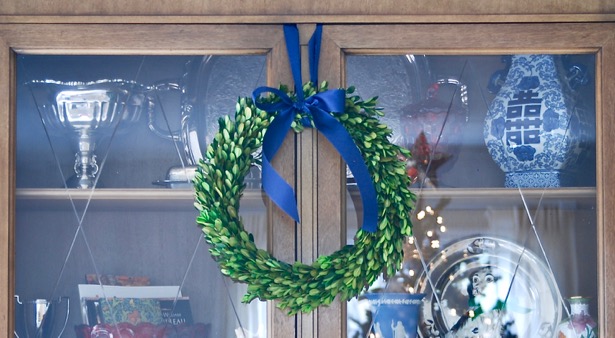
I am just thrilled with how my preserved boxwood wreaths turned out, and I plan on using them long after the holiday season has past. I was a little worried about the amount of brown visible on my boxwood sprigs, but it really is not noticeable now that the wreaths are finished. I plan on monitoring them over the next few weeks for any color change and may spray them with some green floral dye if needed.
You could also do this wreath with fresh boxwood for the holiday season and then recycle the wreath ring for next year. I made fresh holly wreaths for my front doors this Christmas. See that DIY here. There is even a video!
Boxwood is a classic and elegant addition to any home inside or out, and I know you’ll love decorating with your preserved boxwood wreath too. Plus you will have the added satisfaction of knowing you made it yourself and saved money!
Pin this for later:

Partying at Between Naps on the Porch…A Stroll Thru Life…
Hi there! I'm Katherine...

the curator, writer in residence, and decorator behind Pender & Peony.
I’ve decorated my entire 1960s brick colonial with secondhand finds and antiques on a budget without sacrificing style, quality, or comfort.
You CAN have a traditional home with timeless charm on a budget too!
The problem isn't your taste -- it's an industry that glorifies the next big trend and only showcases high end custom design.
That's why I created The Collected Room Method to teach you my approach to the collected interior!
Omg so cute!!! I want to make one. Great idea. Thanks for sharing!
Thanks Karen!
where did you get the abosrbit stem dye? I’m having trouble finding it.
Serenity, I’m so glad you asked! I should have included this in the materials section. There is a link to the floral supply there now! I tried my local craft stores too, but couldn’t locate any, so finally I ordered online from Direct Floral. It came really quick. Good luck with the project!
I’m in love! I have been wanting to do this for so long.
How long do I leave the stems in the solution before hanging them?
10-14 days or until solution is absorbed! Glad you found this helpful!
Katherine – how have your wreaths lasted?
Very well. They have faded a bit, but it has been several years now. The leaves hold fast.
Should the dye work its way up into all the leaves? Only the very ends of my sprigs are green. Should I submerge them?
Yes to an extent. The dye won’t turn the leaves bright green. You can see a lot of mine still had some brown on the undersides. Be sure you put the ends in the water immediately after clipping. No, I would not submerge them you will have dye rubbing off from the leaves and it could cause the leaves to mold.