
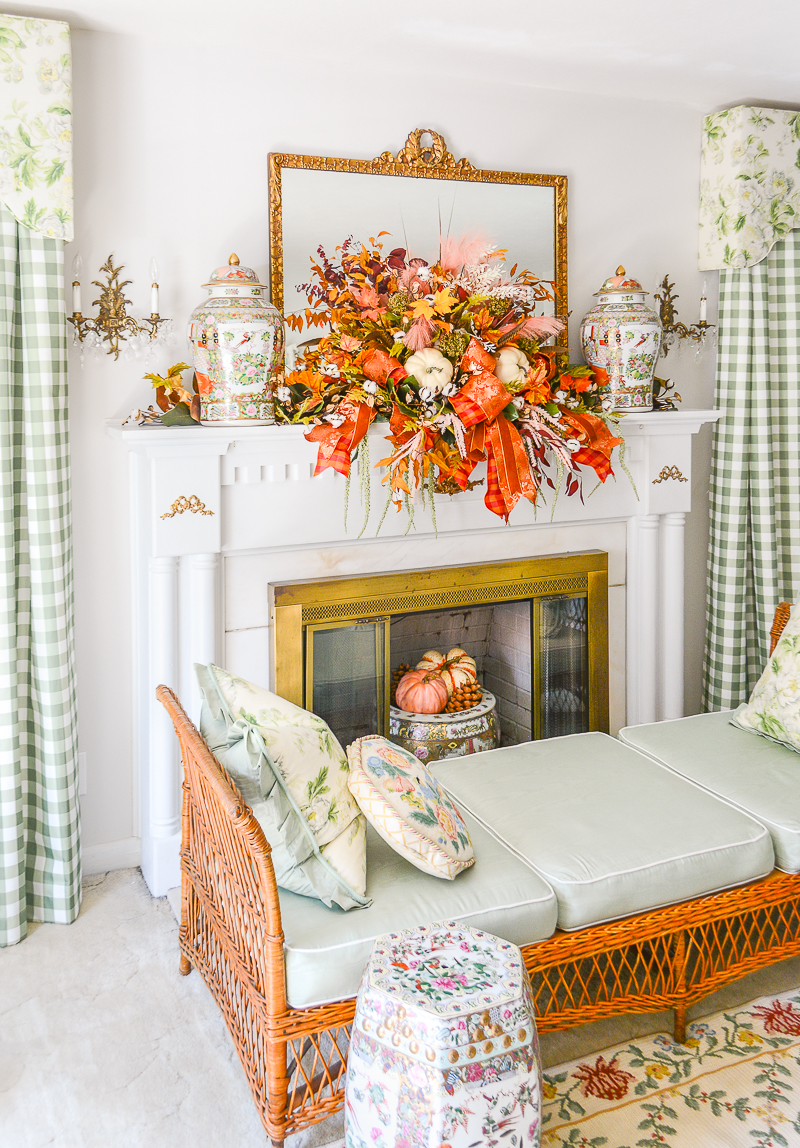
An Autumn Riot – Fall Mantel Decor
Crafting an autumn sculptural garland for fall mantel decor with magnolia, cotton, foliage, pampas grass, and pumpkins. It's a floral riot that feels extravagant and romantic!
Have you ever been inspired to create something that felt a bit outside of your comfort zone?
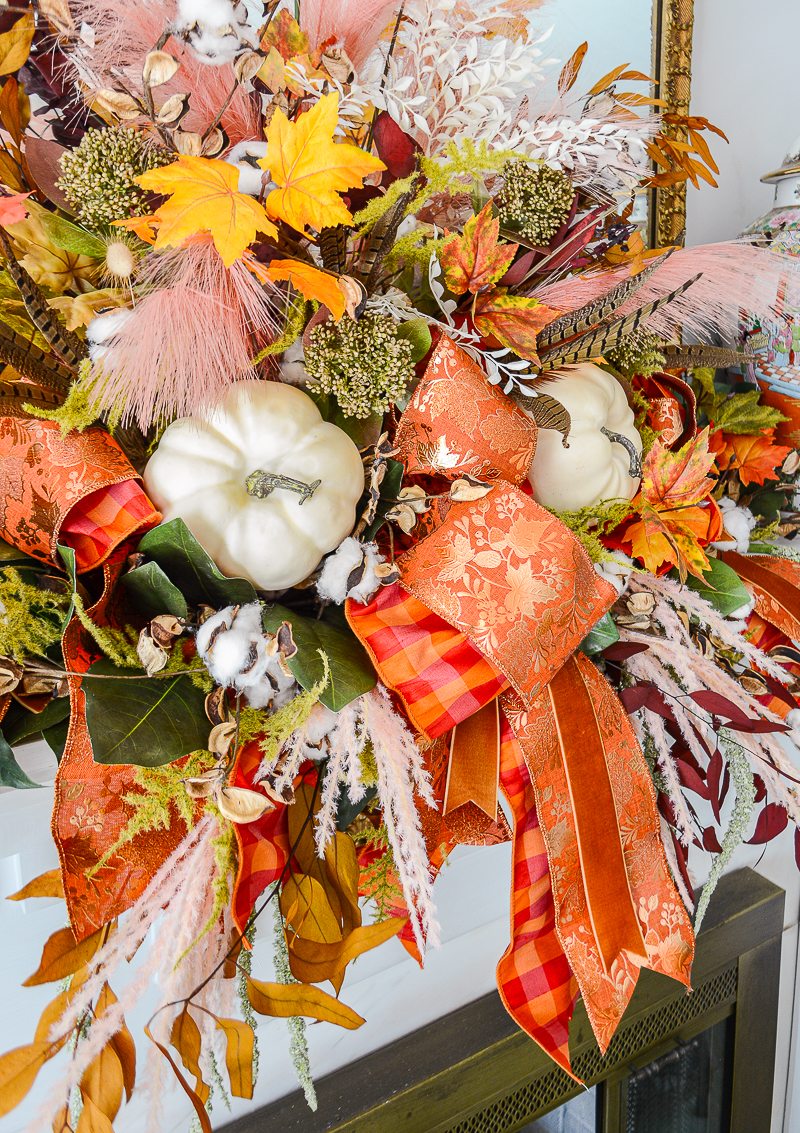
Yes, well...this is exactly how I ended up crafting this autumn sculptural garland for my fall mantel decor! After being wowed by English floral designers Kitten Grayson and Philippa Craddock's elaborate holiday mantel garlands for years, I finally decided this was the season to do it...to jump in and try my hand at an elaborate floral explosion that just screamed autumn!
I gathered all my fall florals from seasons past and made a special trip to the hobby store for more beautiful stems, so I would have a wealth of faux florals to work with. I started with a basic pre-made magnolia garland and some blocks of dry foam then let myself just play, and oh boy did I have fun!
Can't you tell?
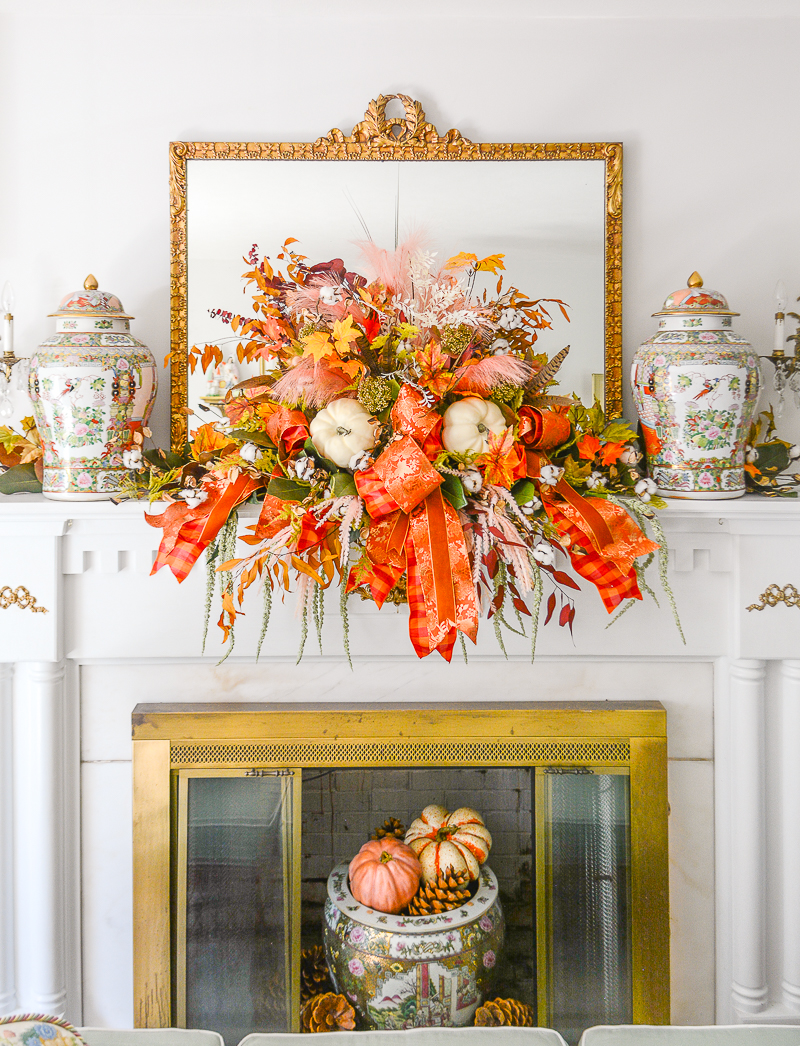
I absolutely LOVE it, and I am so proud of myself for trying something new! I love how sweeping and romantic this mantel garland feels. I love the riot of messy foliage. I love the earthy colors with the vibrant orange. And that ribbon...it just makes my heart sing!
Am I a bit carried away? Maybe...but I'm riding that crafting/decorating high that just makes me happy!
Fall Mantel Decor DIY Garland
If you want to join me in creating a sculptural garland for autumn here's what you'll need:
- 2-6 blocks of dry floral foam (often called desert foam) - the number will just depend on how big your mantel is and how big a creation you want to make.
- Wrapped floral wire
- Dykes or clippers
- Clear floral tape
- Screw driver
- Scissors
- 3 Types of ribbon: gingham, copper leaf, velvet
My recommended autumn floral stems:
Here's how I made this autumn sculptural garland:
Check out the video tutorial over on my Instagram under this highlight.
Step No. 1 Afix dry floral foam to mantel and place magnolia garland across
Secure your blocks of floral foam to each other and the mantel with floral tape. Be sure it is secure, and use a touch more tape then you think you need, so your heavier floral stems don't pull the arrangement off the mantel. Then simply stretch the magnolia garland across the mantel.


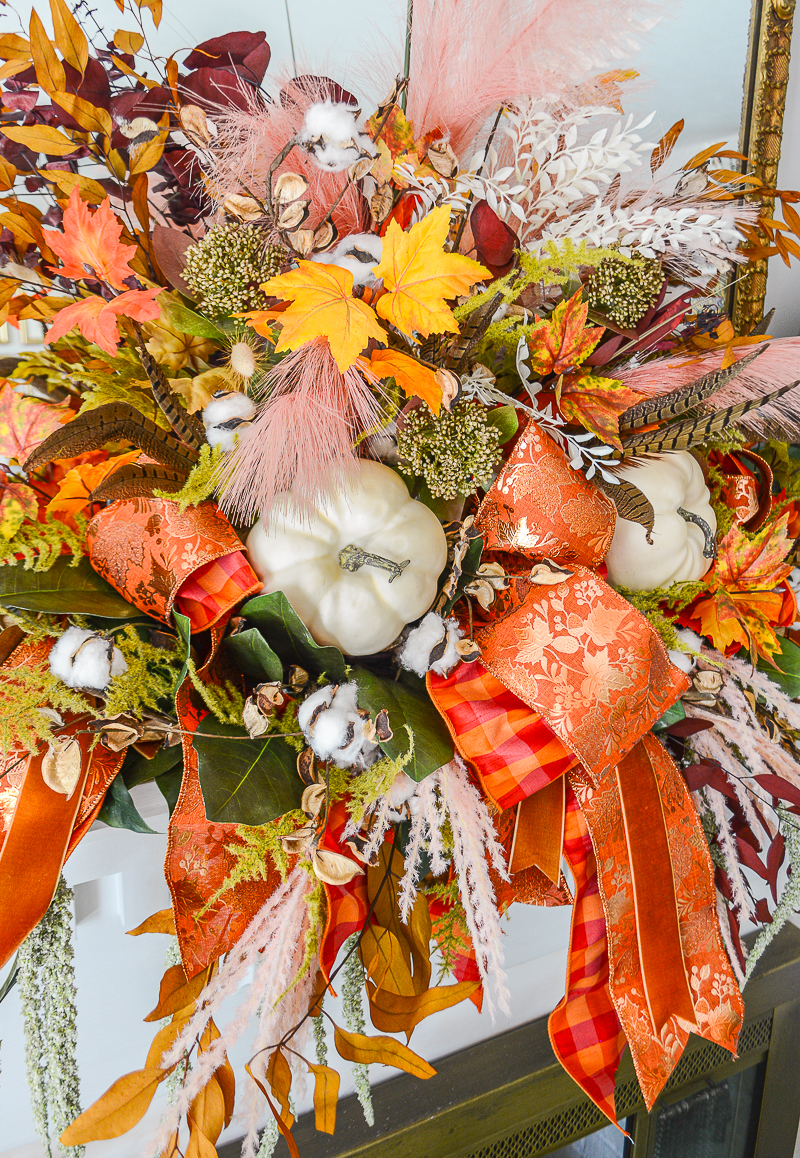
Step No. 2 Fill in garland with cotton stems
The next thing is to fluff your cotton stems and stick them amongst the magnolia leaves. I used two 28"L stems down each side.
Step No. 3 Establish basic shape of centerpiece
Then create the basic shape of the centerpiece explosion of florals, pushing the floral stems into the foam base. I established the height with the pink pampas grass in the center then used dried eucalyptus branches to create the swooping lines at the end. I also used these branches at the bottom of the arrangement to create the shape of the drops off the mantel.

Step No. 4 Build out centerpiece
Now start building out the centerpiece, mixing autumn leaves, cotton sprays, grasses, feathers, and other fall florals. You should work from the back forward and step down in height as you move forward. I like to use dykes to trim the stems off of faux florals. They cut through the plastic and the wire best.

Step No. 5 Fill out downward sprays
Next turn your attention to the bottom drops filling these sprays with the same florals from above and make sure to distribute your colors down here. You may want to add some weeping floral stems like amaranthus or stems you can shape to swoop down.

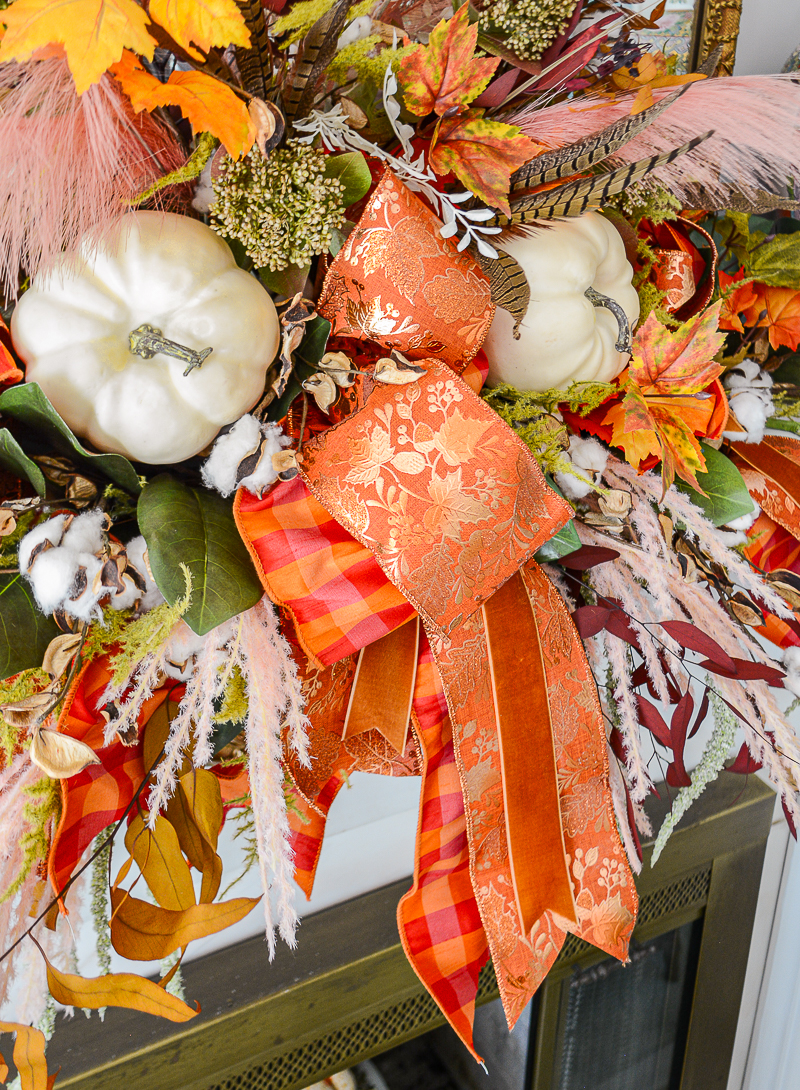
Step No. 6 Add center accent: pumpkins
To create the pumpkin accent, I simply punched a hole with a screw driver into the bottom of each of these white foam pumpkins. Then I used one of the longer wire stems I had cut off a faux floral to push into the bottom of the pumpkin. I stuck the newly created pumpkin stem into the floral foam.


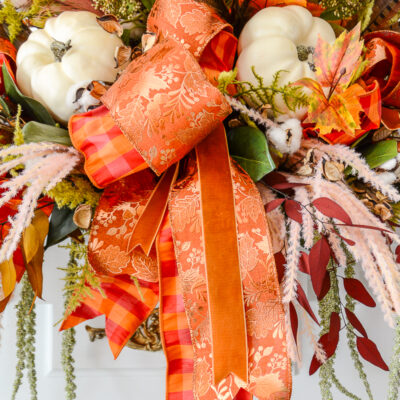
Step No. 7 Add center bow
To create my bow I used three types of ribbon: a pink and orange gingham, an orange copper leaf, and a chestnut hued velvet. All are available in the shop just follow the links. I layered the gingham and the copper leaf on top of each other then tied a simple two loop bow with tails and made one of the loops bigger than the other.
Instead of positioning the bow horizontally, I turned it vertically. I used the stiff wrapped floral wire to tie off the bow and stuck the ends into the floral foam. Then it is just a matter of twisting and fluffing the ribbon so it lays beautifully. Be sure to pull the gingham out from underneath the copper leaf.
To add the velvet ribbon, simply cut a section as long as your bow tails. Wrap a piece of floral wire around the center and tie the wire to the center of the two loop bow. Let it drape down the tails.

Step No. 8 Fill in holes
Now it's time to step back and evaluate your arrangement. Fill in holes. Rearrange as needed to make sure colors and textures are evenly distributed.
Step No. 9 Add ribbon to sides
Move around and consider how the sculptural garland looks from different viewpoints. When I stepped back I realized the sides of my centerpiece needed filling out, so I added two loop bows smaller than the center one to each side. I created these using the same method described in Step 7.
Step No. 10 Fluff florals
As the final step adjust leaves and stems so they look their best. Fluff out your bows, and pull out foliage that may have been squashed during the creation.
I hope you feel inspired by my romantic autumn sculptural garland inspired by English floral design to try something new and creative for your fall mantel decor! Let me know if you have questions about the DIY in the comments.
The ribbons are available to shop here:

Hi there! I'm Katherine...

the curator, writer in residence, and decorator behind Pender & Peony.
I’ve decorated my entire 1960s brick colonial with secondhand finds and antiques on a budget without sacrificing style, quality, or comfort.
You CAN have a traditional home with timeless charm on a budget too!
The problem isn't your taste -- it's an industry that glorifies the next big trend and only showcases high end custom design.
That's why I created The Collected Room Method to teach you my approach to the collected interior!
Gorgeous
Thank you!