
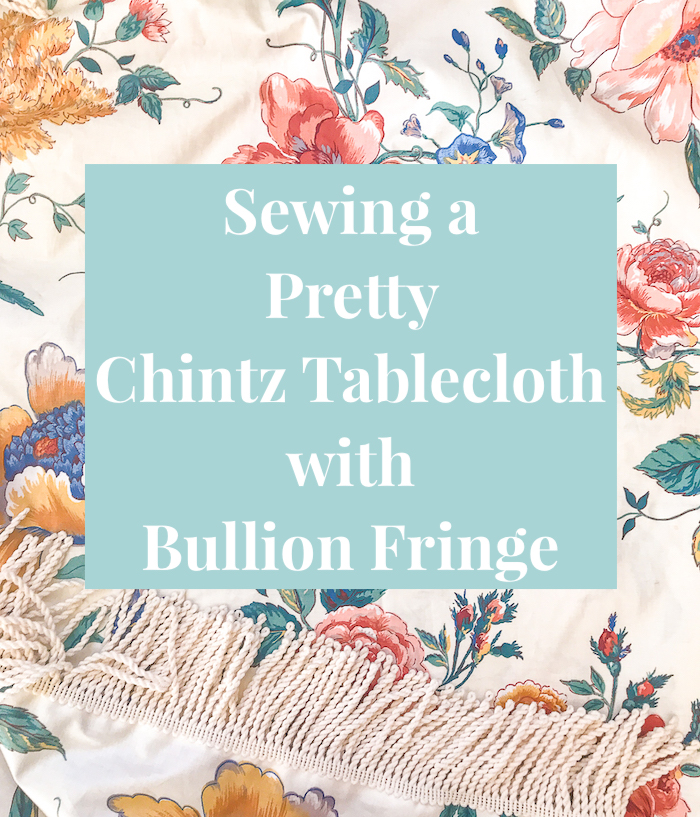
Sewing a Pretty Chintz Tablecloth with Bullion Fringe
Make your own pretty chintz tablecloth with this basic 5 step method to sew a tablecloth with a bullion fringe edging!
In no way, am I an expert seamstress! Let me just be clear about that up front. But I do know my way around a sewing machine thanks to my high school home economics classes and particularly the skilled teacher, Ms. Allen!
I can manage simple seams and even the addition of trim, so when I found this vintage chintz at the thrift I knew immediately I had to turn it into a tablecloth with an elegant bullion fringe! Luckily, there was plenty of fabric both length and width, so I did not have to piece together sections, and I used a long bullion fringe to get the extra drop down on the sides that I needed.
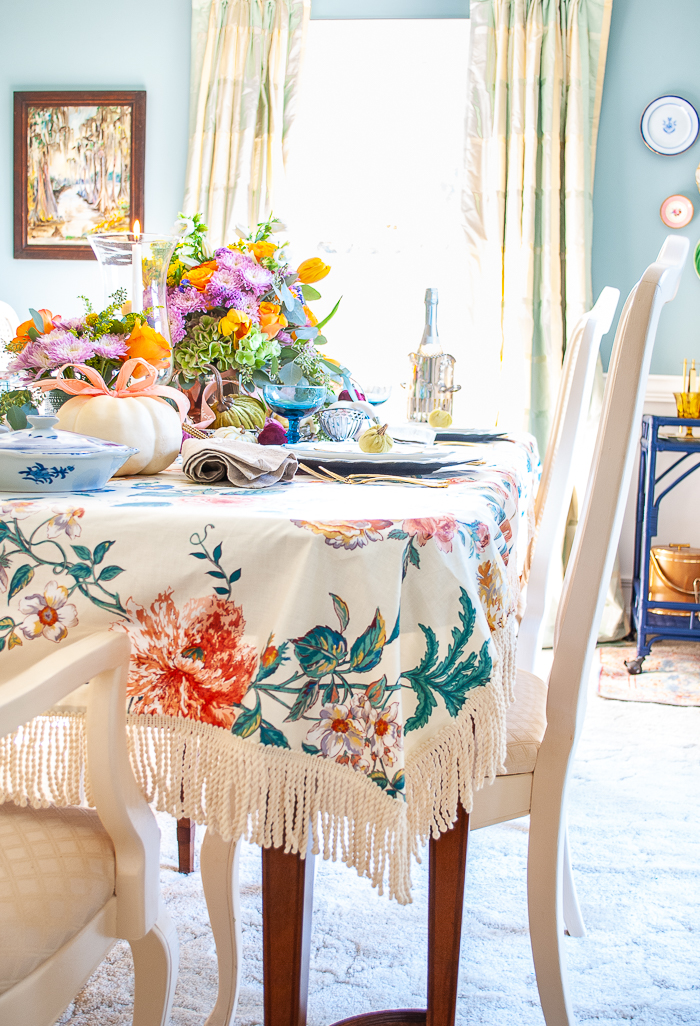
This vintage chintz inspired my entire fall tablescape, which you can see in detail in this post.
I’m exceedingly happy with the results of this sewing DIY, although I did pull my fringe a bit too taut, and that caused a bit of distortion to the way the cloth lays. Thankfully, it is not very noticeable once you set all the dishes and tableware down. Let that be a caution to you up front…don’t pull the fringe to tight!
How to Sew a Pretty Chintz Tablecloth with Bullion Fringe
A Basic Method
Step No. 1 Measure & Cut Your Fabric
Measure the length and width of your table then decide how long you want the fabric to extend down the sides. The general drop down is 10 to 12 inches. Add this drop down length to your table measurements. Then decide how much fabric to allow for the seam. I will show you how to create a basic double fold hem, which will need at least 3/4″ of fabric. Add this amount to the length and width.
My fabric was 54″ width, which allowed for 5″ of drop down on either side of my dining table. To get the additional length, I added a 4″ bullion fringe. This put me at about 9″ of overhang. The selvedges of my fabric were useable, so they were worked into the hem.
Be sure to cut your fabric with sharp scissors. I love these Ginger scissors my mother gave me when I first learned to sew. Don’t forget to account for your drop down and hem allowance.
Note: if you fabric is 100% cotton or other material likely to shrink, be sure to wash it first.
Step No. 2 Iron Out the Wrinkles & Press the First Fold for Hem
Next take your fabric to the ironing board. Iron out any wrinkles.
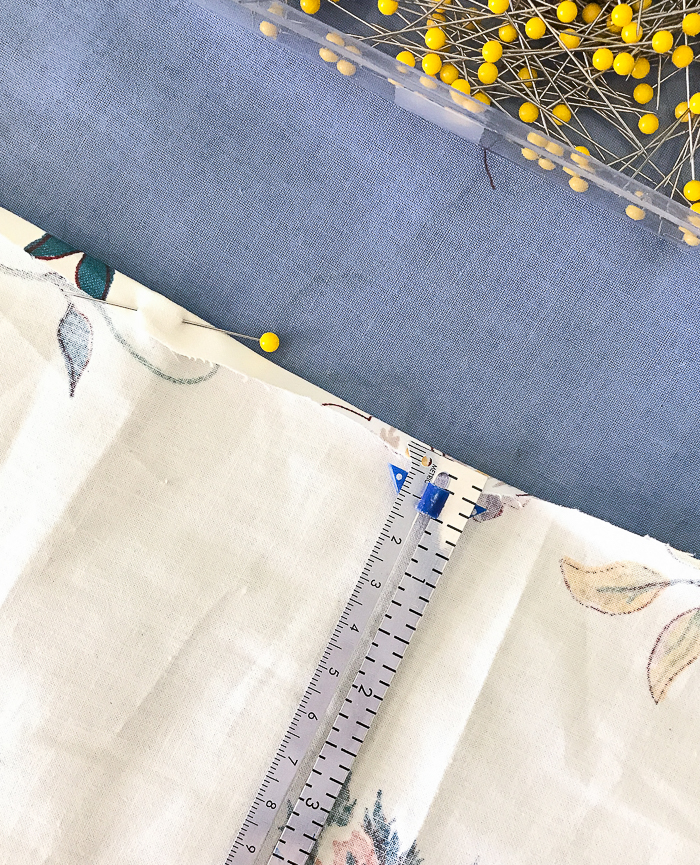
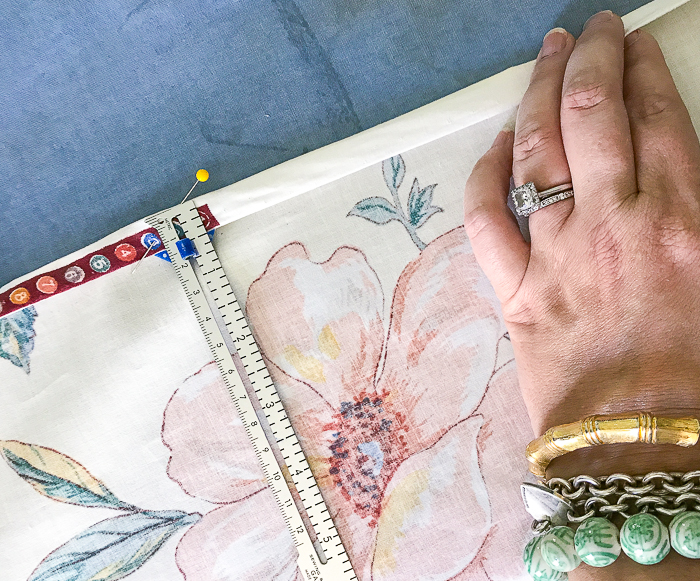
To start your double folded hem, choose one of the short sides and using a sliding gauge hem ruler fold the edge of the fabric down 1/4″. To get the fold to stay in place as you measure and iron use straight pins every 4 to 5 inches. Make this fold around the entire parameter of the cloth.
This is really the most tedious part of this sewing project.
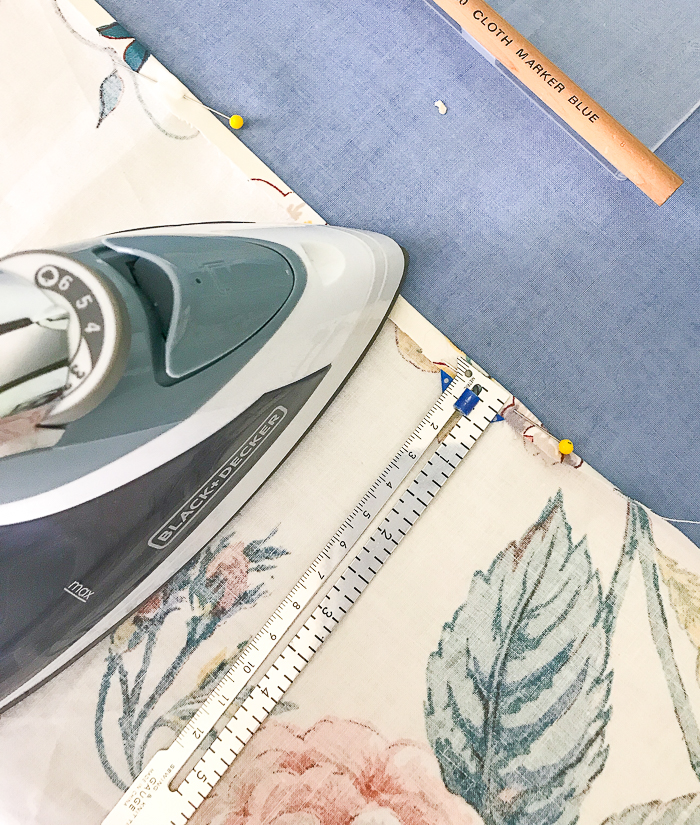
Step No. 3 Fold & Iron Second Fold for Hem
Now it’s time to fold back the edge again to finish the hem. This puts the unfinished fabric edge inside of the hem, so that it cannot fray.
Again using the sliding gauge ruler fold back your fabric edge 1/2″. Re-pin and iron down the fold as you work around all 4 edges.
Step No. 4 Pin Bullion Fringe to Fabric
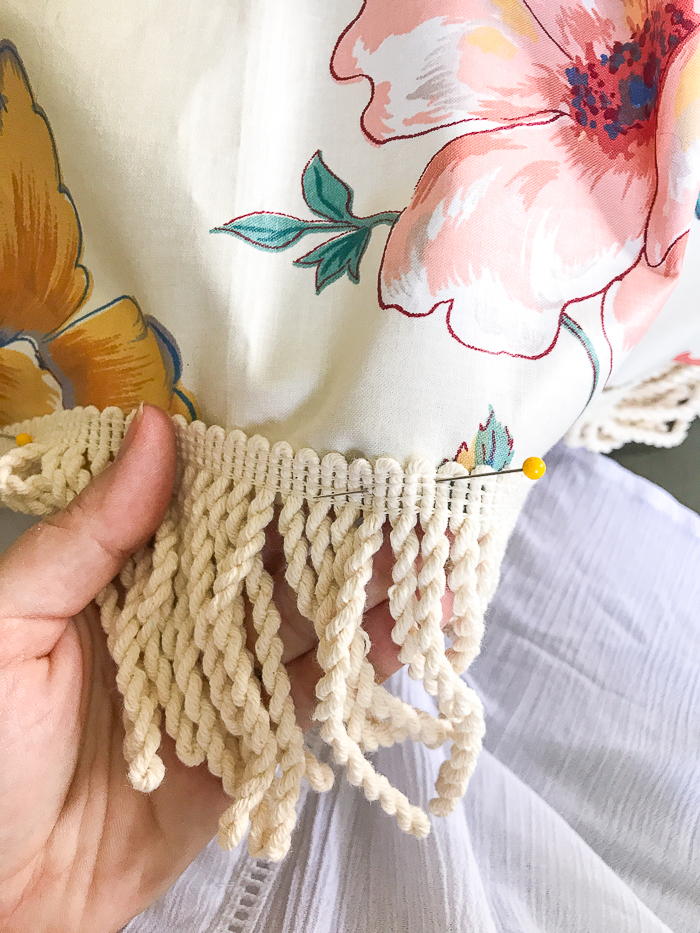
With your double fold hem neatly pressed and pinned down, take your fringe, starting at one corner, and attach it down one side re-using the pins already on the fabric. Lay the top edge of the trim about 1/4″ overlapping on the right side of fabric that way your sewing machine catches and secures the fringe and the double fold hem at the same time.
Bullion fringe is stretchy. You want to pull it taut, but do not stretch it out — a lesson I learned the hard way!
It is really only necessary to pin about half way down one side, because once you start sewing it is easy to hold the fringe on top of the fabric as it goes through the machine.
Step No. 5 Sew Fringe to Fabric
Now you are ready to sew your fabric and fringe together! I used an elongated zig zag stitch to secure them.
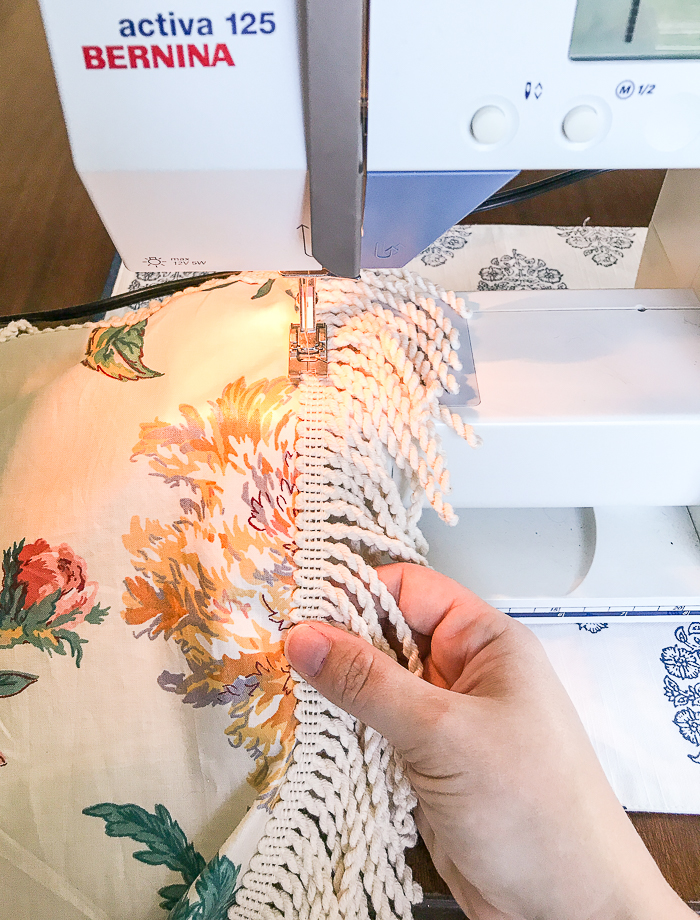
I placed my stitch line in about the middle of the top edge of the fringe, and held the two together as they went through the machine, removing pins as they came close to the sewing foot.
For corners, leave the needle in the fabric and simply turn your fabric to sew the next side.
Iron again to work out any wrinkles set while manipulating fabric and then you are ready to put your new DIY tablecloth to use!

I’m just thrilled with how my pretty chintz tablecloth looks on my autumn tablescape. It is the perfect foundation for the fall florals and vintage tableware. The bullion fringe adds that extra pizzazz and a lovely texture to the cloth!
I hope this sewing tutorial inspires you to make your own tablecloth the next time you find a beautiful fabric.
Hi there! I'm Katherine...

the curator, writer in residence, and decorator behind Pender & Peony.
I’ve decorated my entire 1960s brick colonial with secondhand finds and antiques on a budget without sacrificing style, quality, or comfort.
You CAN have a traditional home with timeless charm on a budget too!
The problem isn't your taste -- it's an industry that glorifies the next big trend and only showcases high end custom design.
That's why I created The Collected Room Method to teach you my approach to the collected interior!
Would you please tell me the name of the blue wall paint? I LOVE what you are doing. I was fretting about sewing bullion to a tablecloth, but you showed me it could be done easily. Thanks.
Oh I’m so glad Carol! The wall color is SW interesting aqua, and it is amazingly good in person! Thanks for stopping by.
Hi Katherine, What a beautiful room, and I love the tablecloth. You did a fabulous job. I am thinking of adding buillion fringe to an inexpensive round tablecloth. I already have one similar to what I am planning, but it was made for me, and the tradesman sewed the fringe about 6in up from the bottom edge of the tablecloth, and I really like that look (and have already ordered the tablecloth). Do you have any suggestions for doing a round tablecloth, other than not stretching the fringe too taut? Thanks so much for your thoughts.
Hey! Thanks so much. I love a good dramatic fringe. I would say test a piece of fringe on some scrap fabric just to see how it feels in your machine. The fringe is bulky and you want to make sure your sewing machine will handle it. Good luck! You’ve got this!