
Update Your China Cabinet with Wallpaper – Easy Tutorial
With this DIY learn how to line the inside of a china cabinet with wallpaper for an easy updated look!


Take you china cabinet from ordinary to FABULOUS with a colorful wallpaper backing!
Literally, the hardest parts will be choosing your pattern and unloading the shelves.
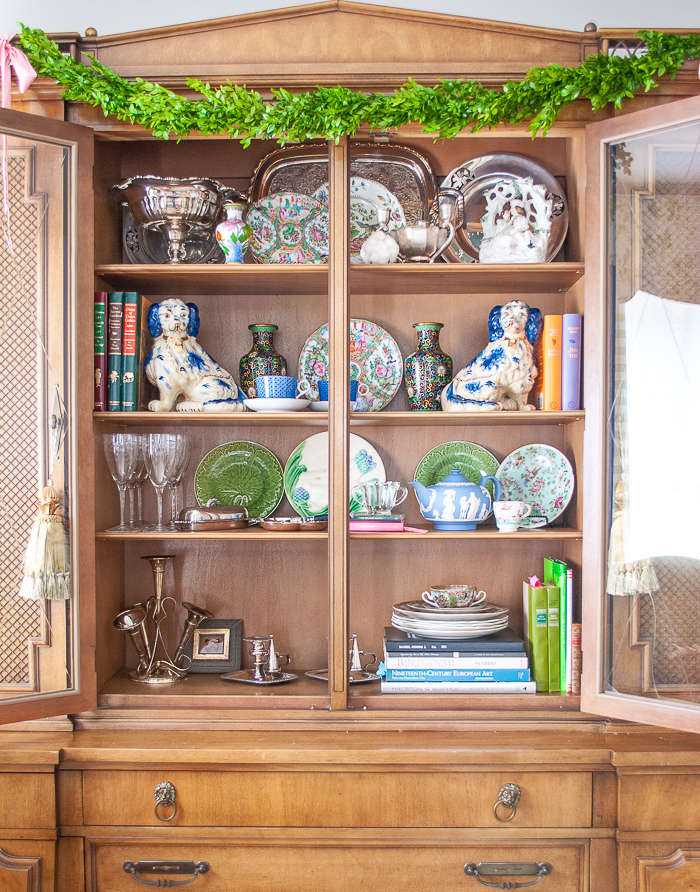
We have a stately neoclassical style cabinet in our living room that I use to store a variety of china, tableware, silver, and table linens. I purchased it at auction several years ago now and, honestly, it has been one of the best investment pieces because it is such a storage help. I love the clean classic lines of the cabinet and the pecan wood, but it was in need of a little extra flair.
I decided a bold shot of color in the display section would be just the ticket, and I quickly landed on the idea of a pretty pink wallpaper to add just the right dose of whimsy and grandmillennial style. Finding the right pattern was a bit more tricky, however.
By pure chance, I happened upon the perfect pattern at an estate sale with several remnants of this vintage Waverly wallpaper. It is a lovely coral pink and the pattern is called Savoy. I immediately knew it was the perfect paper for my china cabinet DIY.
Are you ready to learn how to line a china cabinet with wallpaper?
Yes! Let’s do it!
Supplies
Gather up the following supplies:
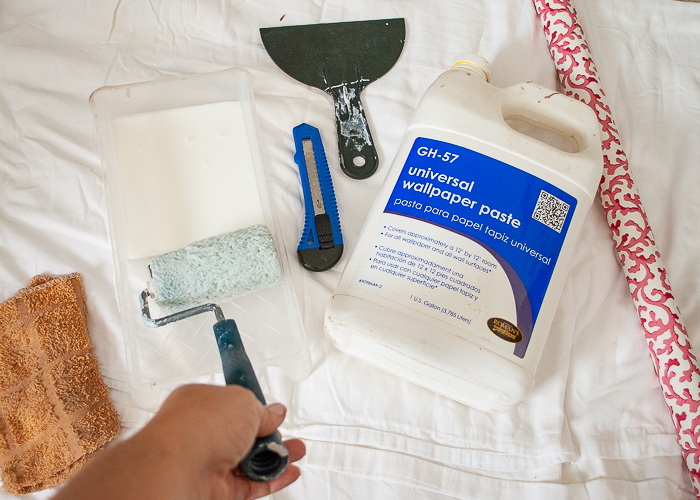
- Enough wallpaper to cover the back and sides, if desirable, of you china cabinet. Measure the area to find out how much you need.
- Measuring tape
- Universal wallpaper paste, if wallpaper is not pre-pasted
- A small paint tray and roller
- A wet rag
- A plastic smoothing tool
- A straight razor or exacto knife
This looks like a great wallpaper installation kit!
How to Back Your China Cabinet with Wallpaper:
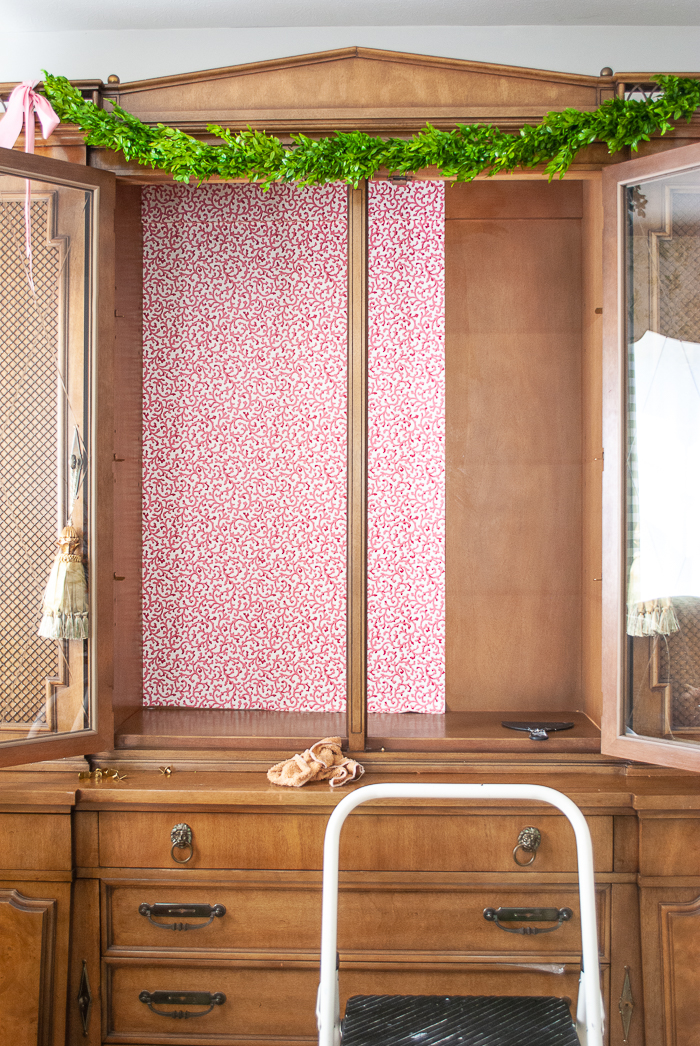
Step 1 Clean out your cabinet
Remove all the contents of your china cabinet including the shelves and shelf pegs. Be sure to place your breakable china and glassware somewhere safe out of the way of your work zone. Then wipe down the inside of the cabinet with a wet cloth to remove all dust and debris.
Step 2 Measure & cut wallpaper
Measure the height of your cabinet back and then cut the wallpaper that length plus an extra inch at top and bottom. If you will need two widths of paper to span the back, go ahead and cut that length too.
When cutting keep the edge as straight as possible. If you use the straight razor make sure you are not cutting into the surface below you.

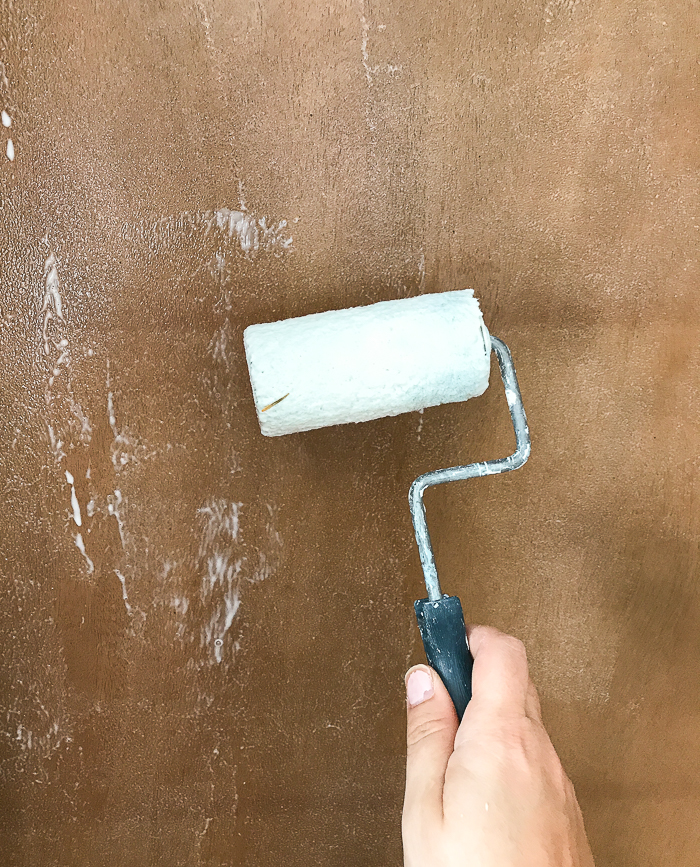
Step 3 Roll on glue for one section
Spread an even coat of glue from top to bottom and horizontally the width of the paper. I used a small paint roller to get an even coat quickly, but a large brush would work too.
Step 4 Install the wallpaper starting at the top
Holding the wallpaper at the top corners twist about an inch over your thumbs and put that fold at the intersection of the cabinet back and top. You want a good margin (about an inch) of paper above the backing, so that you can come back and cut it evenly.
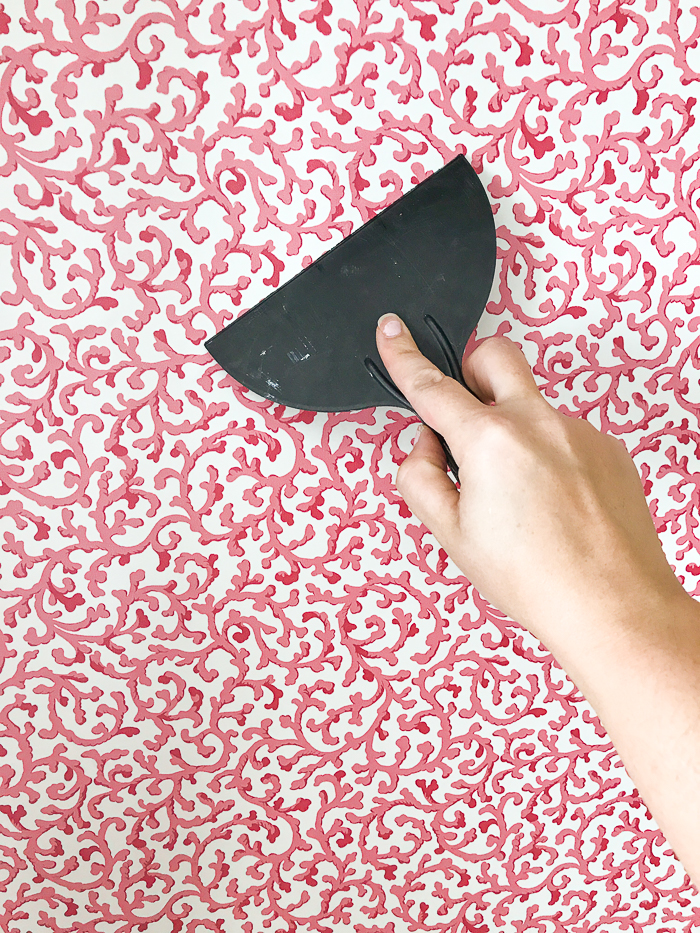
Step 5 Adhere the paper to the glue
Once you have the top securely in place smooth down the wallpaper with your hands. Work from top to bottom and center out. Keep the paper level and your left edge even along the corner. If you find it shifting to one side, you can peel the paper up from the bottom and push the drooped side up.
Go back with your plastic smoothing tool and work out any air bubbles. Press firmly but evenly across the edge of the tool. You do not want to use too much pressure at either end as you might gouge the paper or press in a wrinkle.
You may notice as you smooth the paper excess glue sliding out under the edges. Use your wet cloth to wipe this up.
Step 6 Put up second sheet of wallpaper
You will likely need to cut down the width of your second sheet of wallpaper. If the pattern is big, it will need to match up to the first sheet, so the pattern continues across correctly. Figure out which side of the paper does that and cut the opposite side. Be sure to leave an inch or so margin to go into the corner for an even edge.
I’ll be honest, I did not try to match my pattern. The Savoy is so busy and there will always be dishes and tableware in front of it, so I just didn’t bother.
Follow the same methods to install as steps 3 through 6.
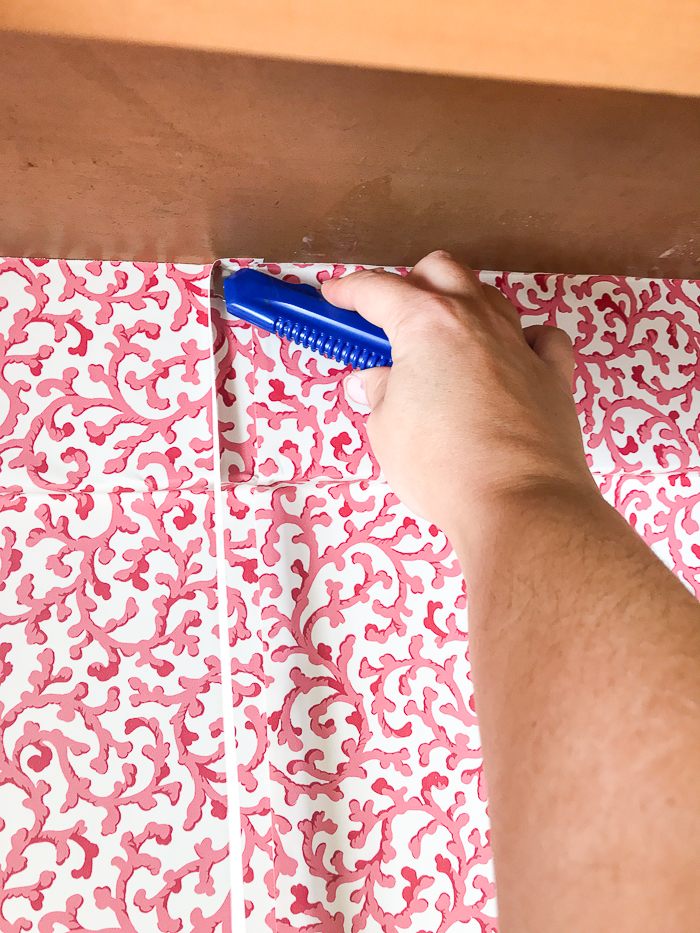
Step 7 Trim away excess wallpaper at edges
Allow the wallpaper an hour or so to dry then trim excess at top, bottom, and sides. Use your straight blade or exacto knife to trim the margin of paper you left when installing.
Push the tip of the blade into the corner so that you get an even edge perfectly lined up.
You may need to take a bit of glue and smooth down the newly cut edge. Just dab a brush or your finger and rub some underneath the paper edge. Wipe away excess with wet cloth.
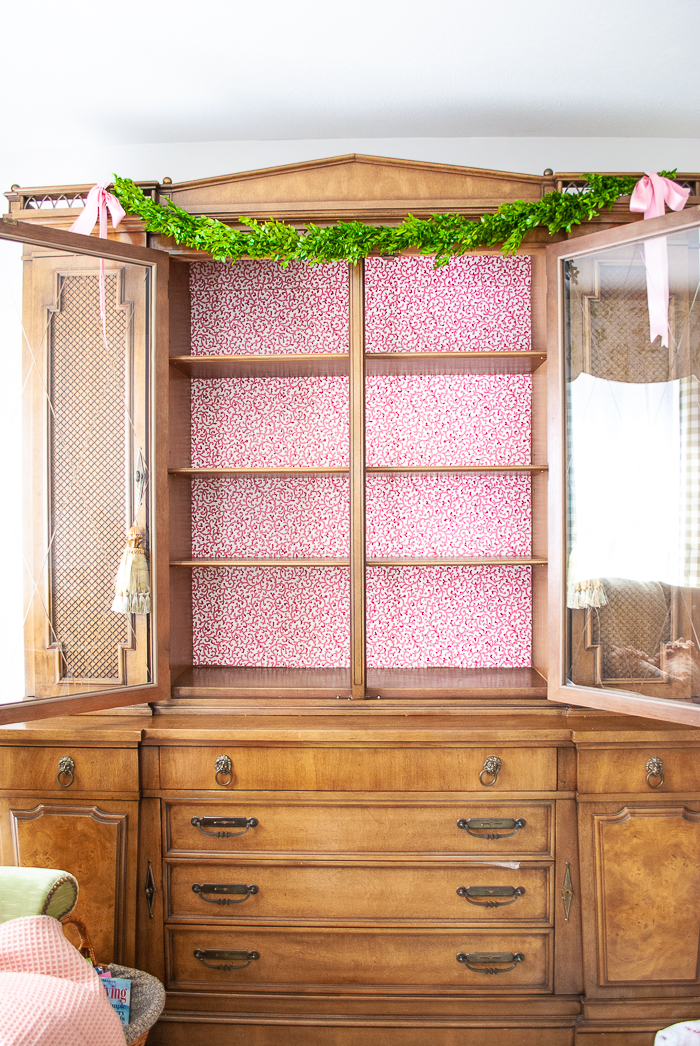
Step 8 Reinstall shelves and style your china cabinet
Now for the really fun part!
Once your shelves are reinstalled, play with styling your china, silver, glassware and other treasures in your newly updated china cabinet with wallpaper backing. Place larger items on the bottom and try to keep a balanced feeling from side to side.
Show off your dishes by standing them up on their edge. For more tips read this post!
I really enjoyed mixing up my arrangement, and playing off the new pop of pink the wallpaper brought to the shelves!
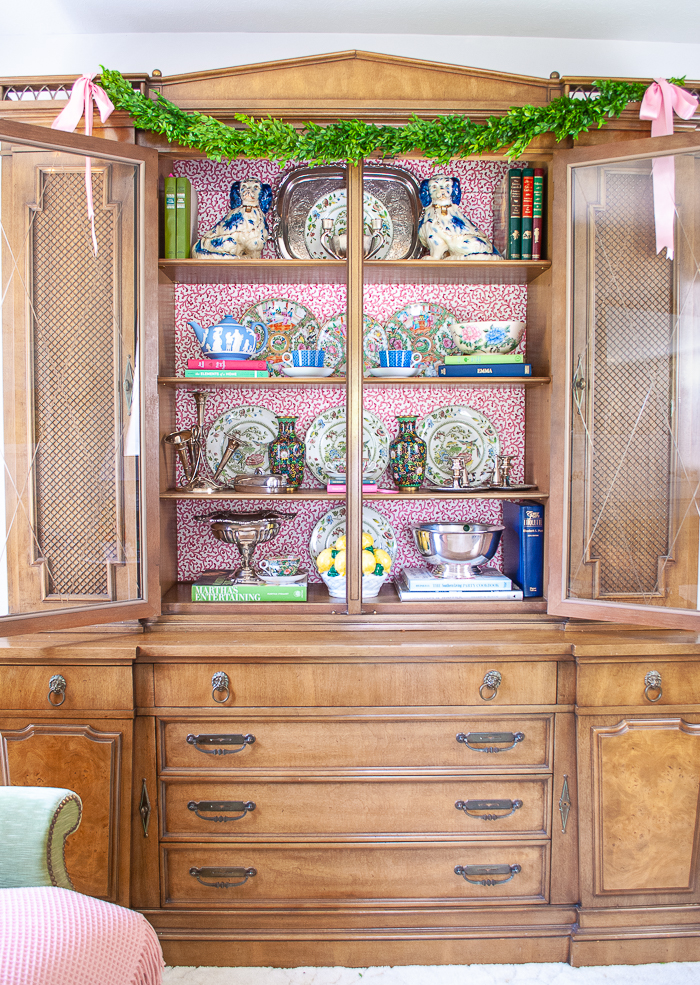
I could not be more thrilled with how my china cabinet with wallpaper backing looks! I think the Waverly pattern added the perfect dose of color and pattern.
Look how well it complements my collection of Rose Medallion!
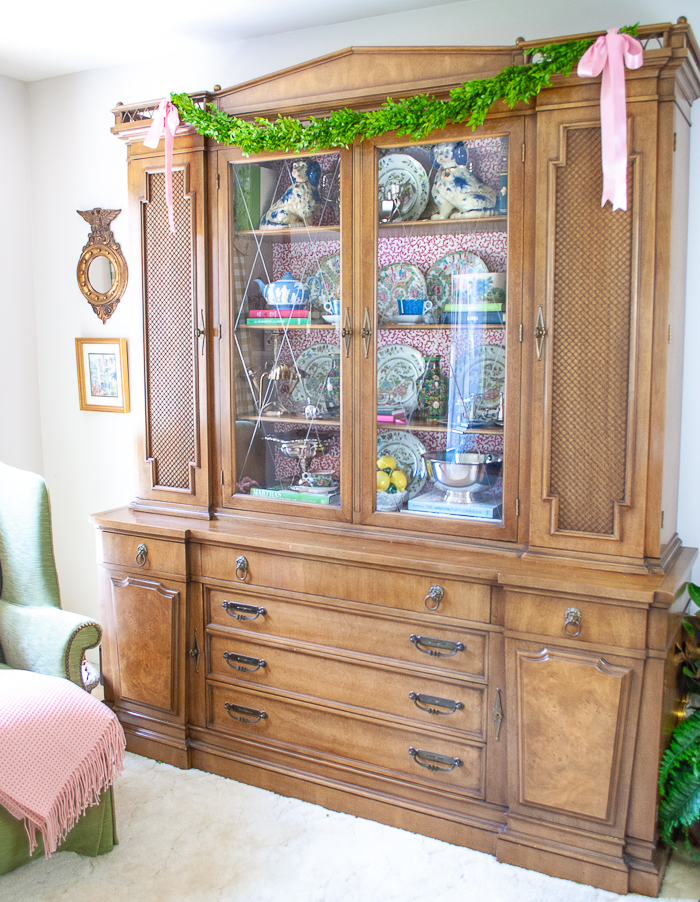
Even with the doors closed you can see the pop of pink, and it helps tie together this accent color throughout the room.
For my tips to style a china cabinet read this!
If you’ve got any questions about this wallpaper DIY, drop them below. I hope you feel prepared to tackle your china cabinet update, and take it from ordinary to FABULOUS!
A Few Wallpaper Suggestions for Lining Your Cabinet:
Hi there! I'm Katherine...

the curator, writer in residence, and decorator behind Pender & Peony.
I’ve decorated my entire 1960s brick colonial with secondhand finds and antiques on a budget without sacrificing style, quality, or comfort.
You CAN have a traditional home with timeless charm on a budget too!
The problem isn't your taste -- it's an industry that glorifies the next big trend and only showcases high end custom design.
That's why I created The Collected Room Method to teach you my approach to the collected interior!
Lovely and inspiring. It must have been fate that you found the pattern at that time in your decorating journey.
Thank you!