
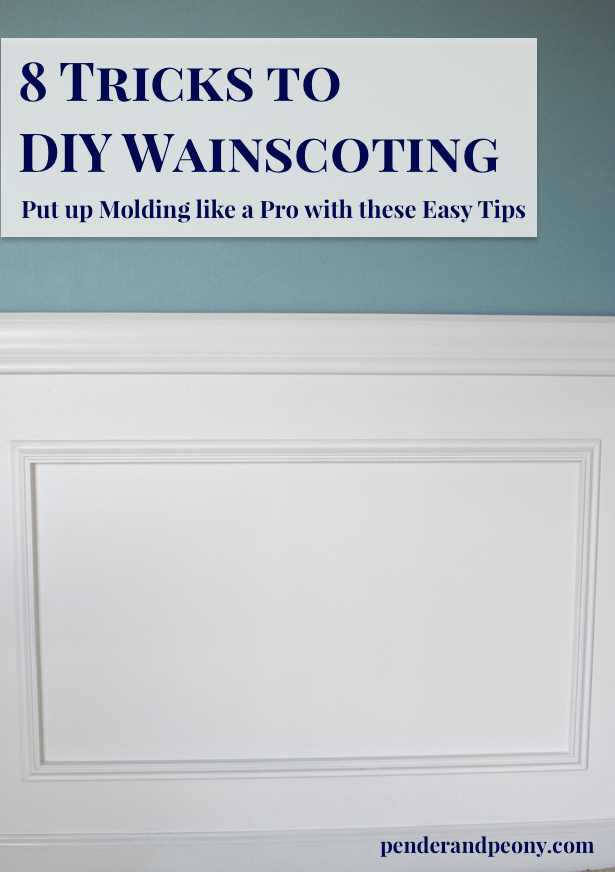
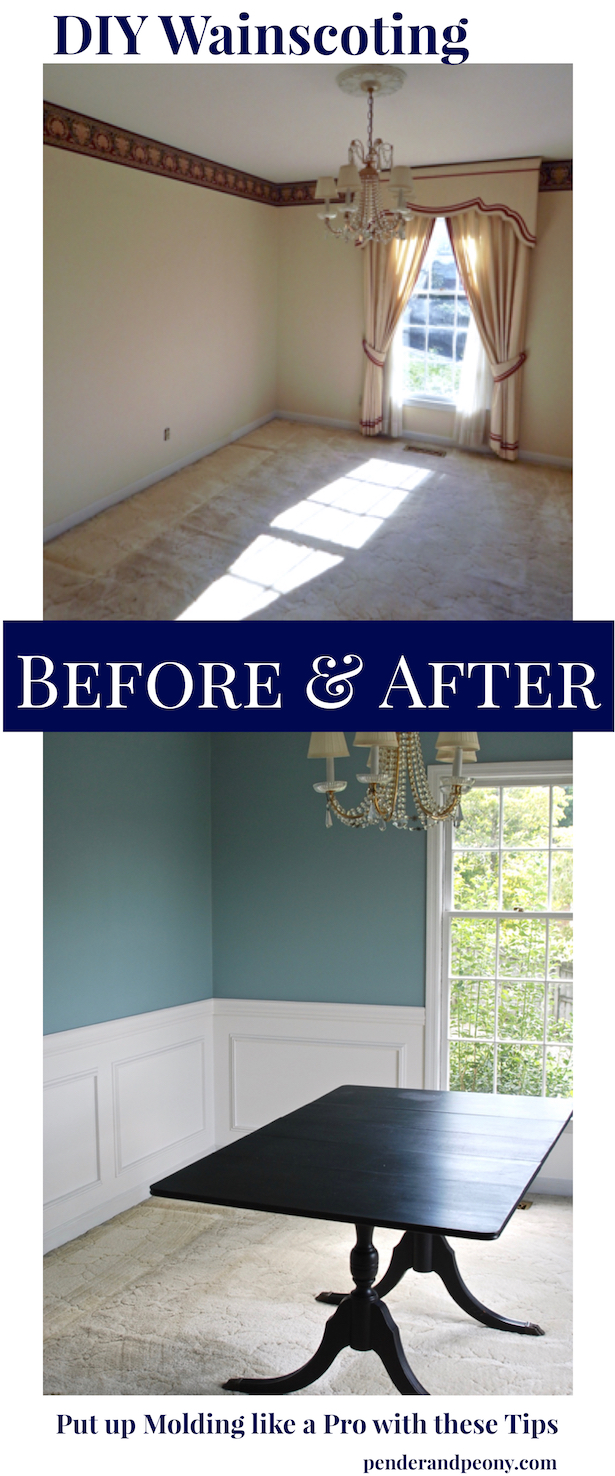
8 Tricks to DIY Wainscoting
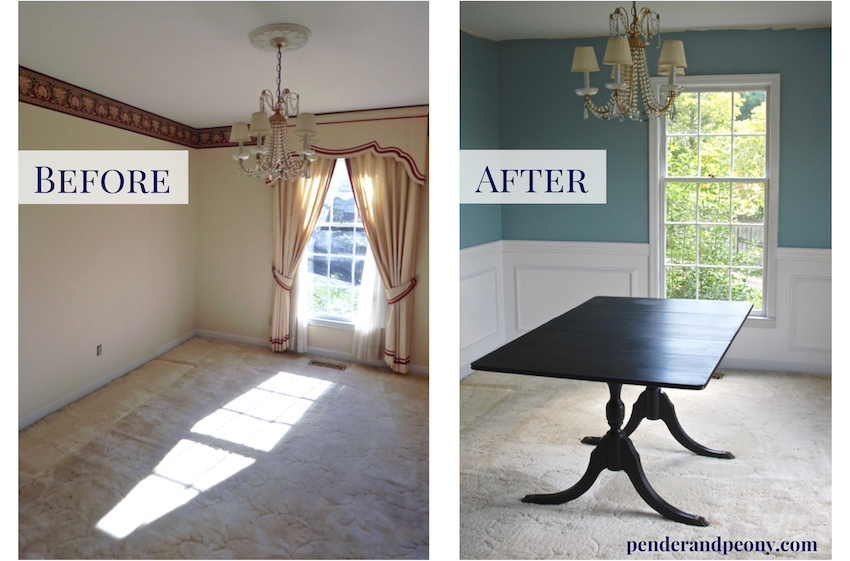
Progress is finally being made on our renovations! Progress you can really see! Over the weekend S. and I completed our dining room DIY wainscoting and chair rail project. Who am I kidding? S. did most of the work; he is a jack of all trades: a mechanic, a carpenter, and one hell of a handsome ginger all rolled into one fine Southern gentleman. I know ladies. I really lucked out!
What you don’t know about S. is that he is a pro at putting up molding. He did all of this in a weekend on top of a time sucking trip to Lowes with me documenting him the whole way. Plus I was distracting him with questions about what he was doing and why, just so I could share his know-how with you all. Superhero badge earned!
You might be wondering what my contributions were to all of this hard work. Well…faux picture frame wainscoting and a chair rail were my idea in the first place. Oh…and I did the painting!
Alright Let’s Get to It! 8 Tricks to DIY Wainscoting:
No. 1 Paint Molding Before Putting It Up
Why? Its just easier. Be sure it is good and dry before installing. You will have to go back and touch up nail holes and smudges.

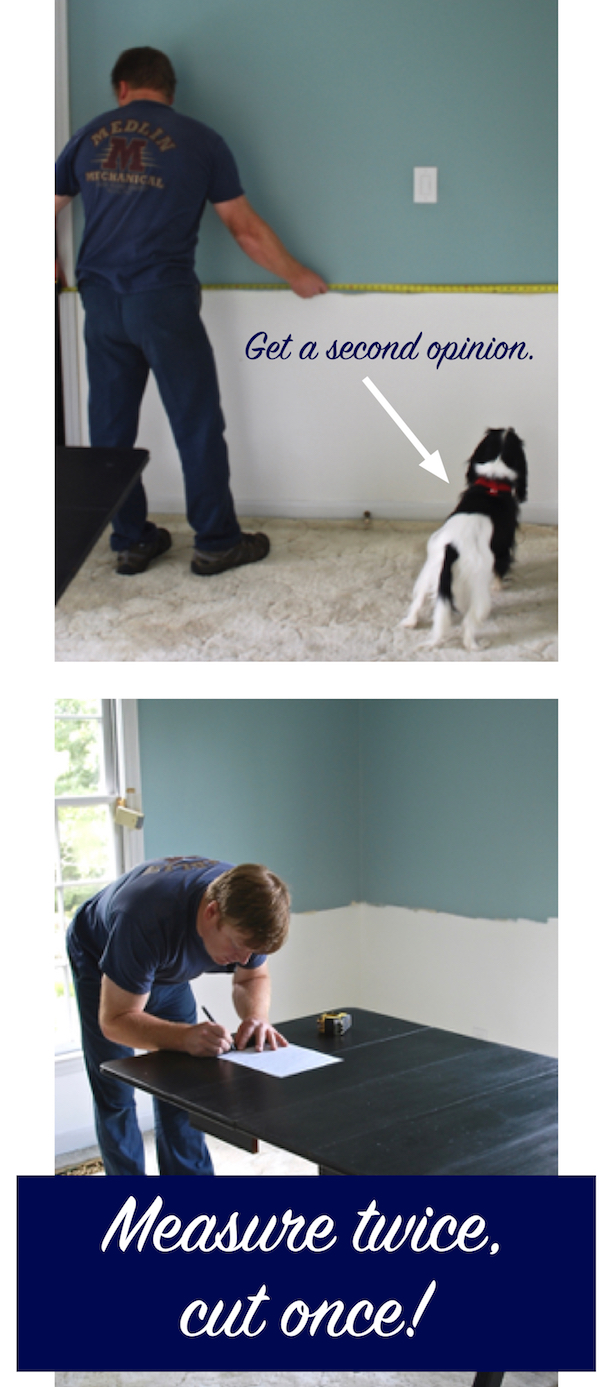
No. 2 Measure Twice, Cut Once
You know that saying. Well, our advice is actually to measure twice, have a second set of eyes check you, then cut once (Henry was fascinated with the tape measure). Measure each length of wall where you will be installing the chair rail. Our chair rail height is at 33 inches. This is based on where the top of our dining room chairs hit the wall. Measure your height on one wall where you start the chair rail. Use the laser level to make it level across the wall. Then work around the room, making sure that each new section of chair rail is even with the one before it. This is important if you have un-even floors. So we started with a height of 33 inches, but in the opposite corner the height is actually 33 ½ inches off the floor, but it looks level.
No. 3 Put Your Nails into the Studs
You can purchase one of those fancy stud finders, but S. prefers to use the outlet method. Basically, you use an outlet on the wall to find the stud. The outlet will be attached to one side of the stud. Tap up and down on either side of the outlet, listening for the higher more solid tone that signals a two-by-four. Then measure every 16 inches (studs are sometimes at 24 inches) to find the other studs and mark your molding or wall for the nail holes.


No. 4 Blunt the Ends of Finishing Nails
Use your hammer to lightly tap down the pointed end of the nail. This will help keep the molding from splitting.

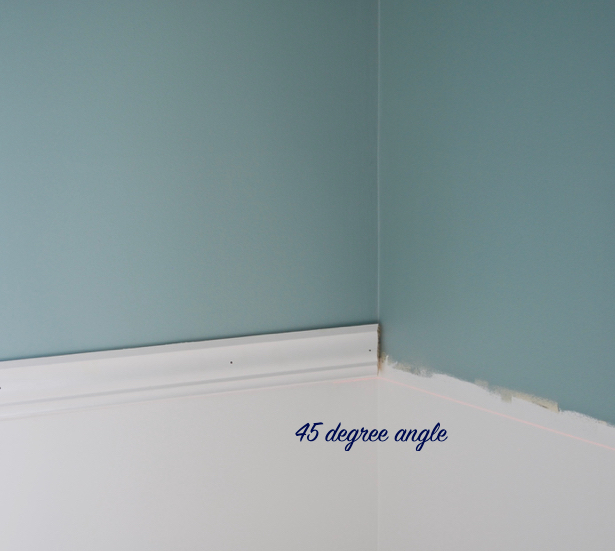
No. 5 Corners are Easier than They Look
Cut first molding piece on its side at a 45 degree angle then cut its corner mate in the opposite direction on its side at a 45 degree angle. Make sure angles meet up before installing.
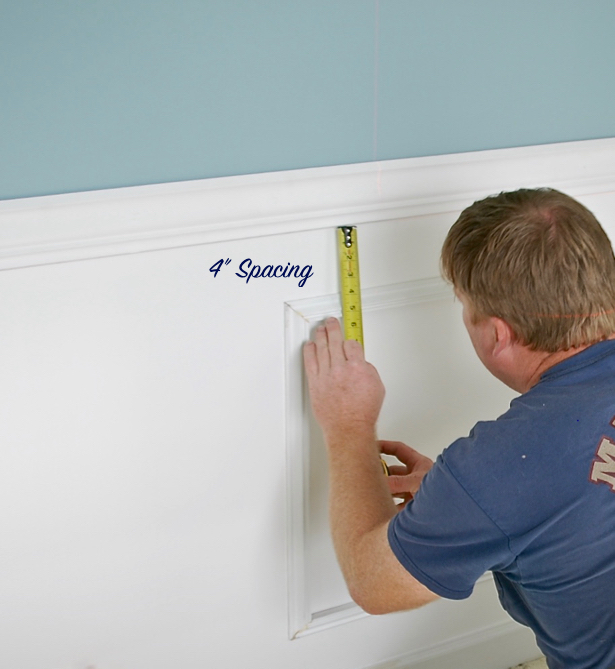
No. 6 Make the Height of and Spacing around Wainscoting the Same
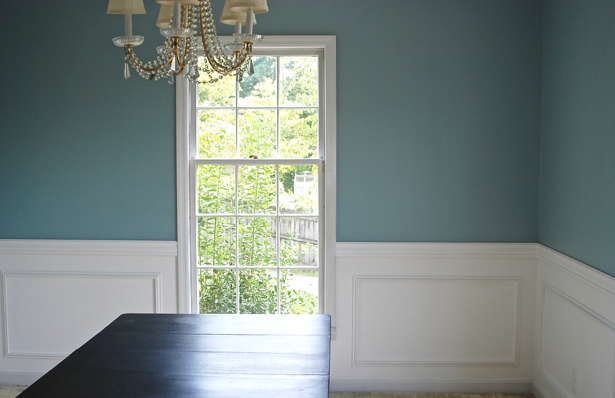
No matter how long or how many boxes you do for the picture frame wainscoting, it will look better and uniform if they are all the same height and evenly spaced from the chair rail, baseboard, and each other. Our wainscoting is spaced 4 inches from these other elements.
No. 7 Make Picture Frames
Since we actually installed faux picture frame wainscoting, not the raised panel version, S. basically just made frames at the height and length we wanted for each box. He stapled the corners together on the back. Then he hung them on the wall with only a few, strategically placed nails in the studs.


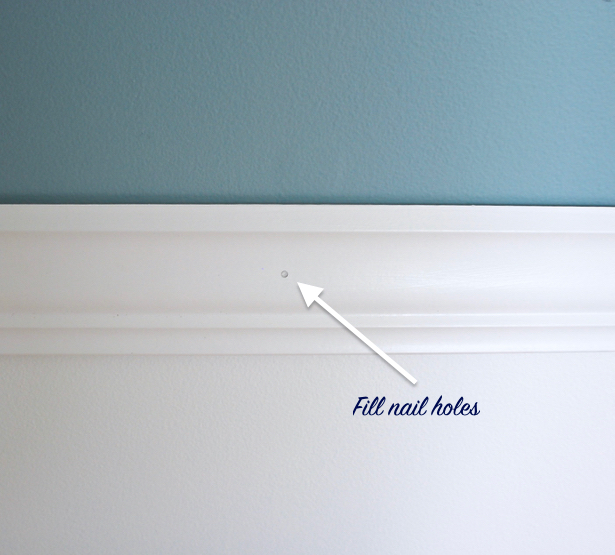
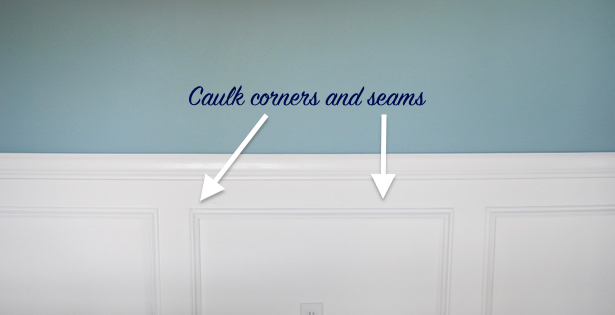
No. 8 Caulk is Your Best Friend
Chances are your frames and chair rail will not be perfectly aligned at the corners without any gaps. Use caulk to fill in these corner seams and anywhere there are visible seams between the molding and wall. You can also use it or sheet rock mud to fill the nail holes. This will give that finishing touch to the chair rail and wainscoting.
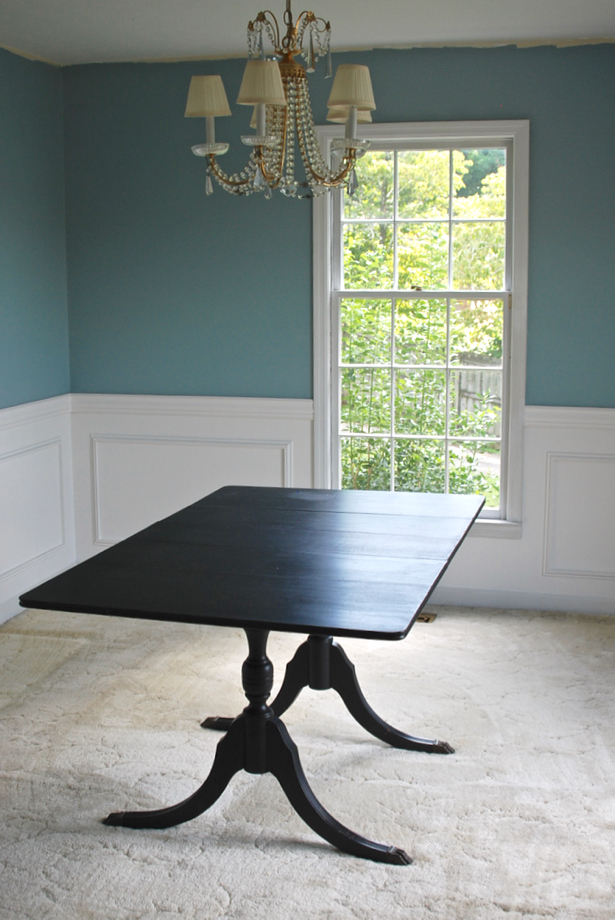
Aren’t you ready to tackle that wainscoting or chair rail project now? I hope these tricks to DIY wainscoting help you out! As you can see we are still not done with the dining room. Check out our adventures with crown molding here!
See the full dining room renovation reveal here!
Partying at Remodelaholic – The Creative Circle– Metamorphosis Monday – Inspire Me Tuesday
Hi there! I'm Katherine...

the curator, writer in residence, and decorator behind Pender & Peony.
I’ve decorated my entire 1960s brick colonial with secondhand finds and antiques on a budget without sacrificing style, quality, or comfort.
You CAN have a traditional home with timeless charm on a budget too!
The problem isn't your taste -- it's an industry that glorifies the next big trend and only showcases high end custom design.
That's why I created The Collected Room Method to teach you my approach to the collected interior!
Great tutorial. Love it.
Thanks Marty! I love getting feedback!
Beautiful job. Love the wall color and table. You’re on your way to a beautiful dining room!
Thank you so much Connie! The walls are SW Interesting Aqua, and I picked up that table from a garage sale; it is vintage 1930-40’s (I think). Stay tuned as we press our way to a finished space.
these are great tips! well done, it looks beautiful. my hubby actually did this in our daughter’s nursery in a previous home. it was new construction home so all the walls were textured so he started by sanding it all down so we would have a flat surface to create the frames (we had dust all overt the house-lol!). wish we would have had your post before doing it. great post! found you thru a stroll thru life link party. xo- maryjo
https://masterpiecesofmylife.com
Thanks MaryJo! I’m really happy with the way it turned out, and honestly having to resist the urge to put wainscoting everywhere! hehe…
I bet it’s beautiful in the nursery. What color did you do the top?
What a fantastic makeover, your room suits that gorgeous blue, I am very tempted to use this colour myself in my entrance-way. Your tutorial is great as I want to put some wainscoting in my hallway too so this will be helpful.
Thanks you for sharing, hopped over from The Dedicated House “Anything Blue Friday”.
I’m so glad you found it helpful! I think this color would be great in an entryway!
Goodness! It looks amazing! Thanks for sharing! Sorry for being late letting you know you are one of the features at the Anything Blue Friday party! We were celebrating Little Dedicated’s 9th birthday! Here is the link to this week’s blue soiree. http://www.thededicatedhouse.com/2016/09/anything-blue-friday-week-115.html Happy Sunday! Toodles, Kathryn @TheDedicatedHouse
Oh I love how your dinning room has turned out!! Great tips and I’m so glad that you got a second opinion from Henry!! What a cutie!
hehe thanks Sam!
What a great project, I love wainscoting and yours turned out beautifully. What a transformation to your dining room! Thanks for linking it to Waste Not Wednesday 🙂
We love it! Thank you!
Great project!! Turned out gorgeous! Did you paint your table? Do you have a tutorial for it? Thank you!
Hi Heather, thanks so much. No, I did not paint my table but bought it already done. Check out Thirty-Eighth Street for a tutorial!
http://www.thirtyeighthstreet.com/2017/09/how-to-paint-wood-furniture-with-pure-and-original-paint.html
The wainscoting looks great. How lucky you have S who knows what he is doing.
I appreciate it Debra! Yes, I truly am one lucky lady. S. has mad skills!
I am so happy I saw this post. My son moved out and we’re making his bedroom into a formal dining room. Our idea was to do exactly what you did. We were originally going to buy the wainscoting from the big box store. It would have cost us a fortune. You’re way is much more desirable and beautiful. Thank you for the DIY tips. 😉
Cindy, I’m so glad this post found you at the right time! Yes, we couldn’t afford to pay that price either, but we love how this “faux” version looks. Happy DIYing!